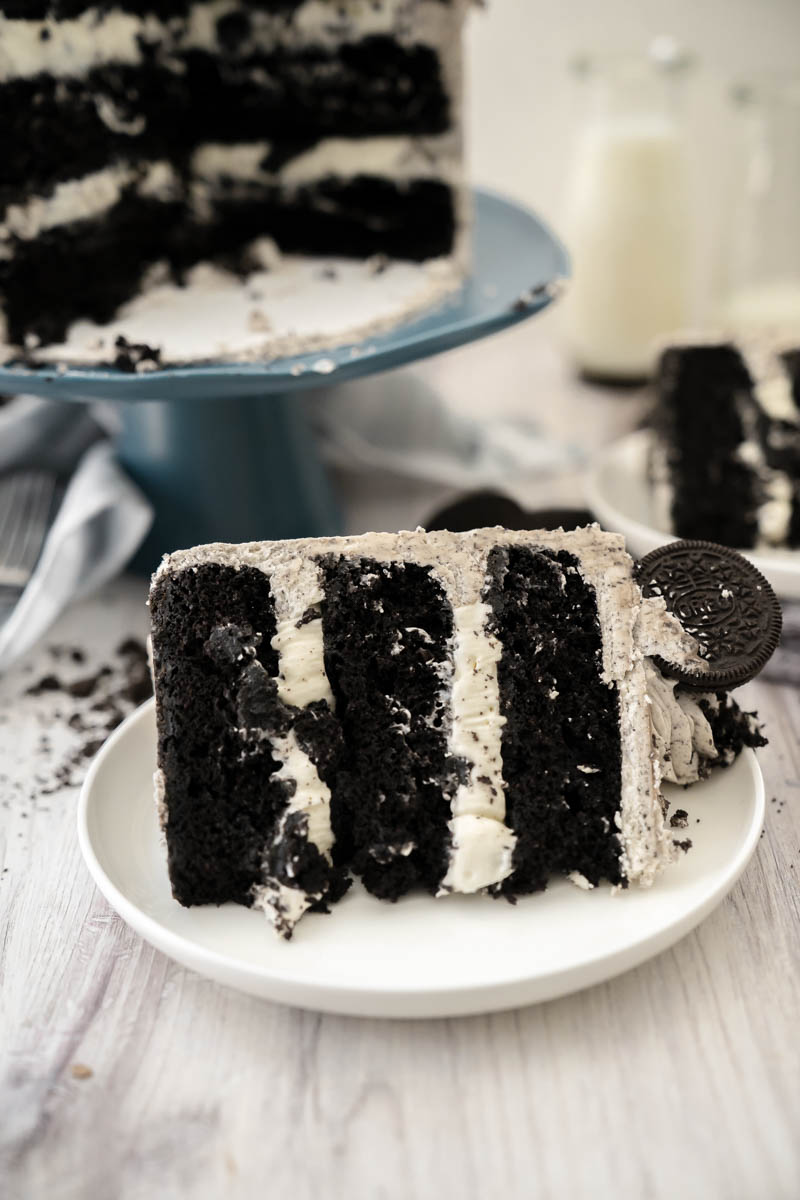
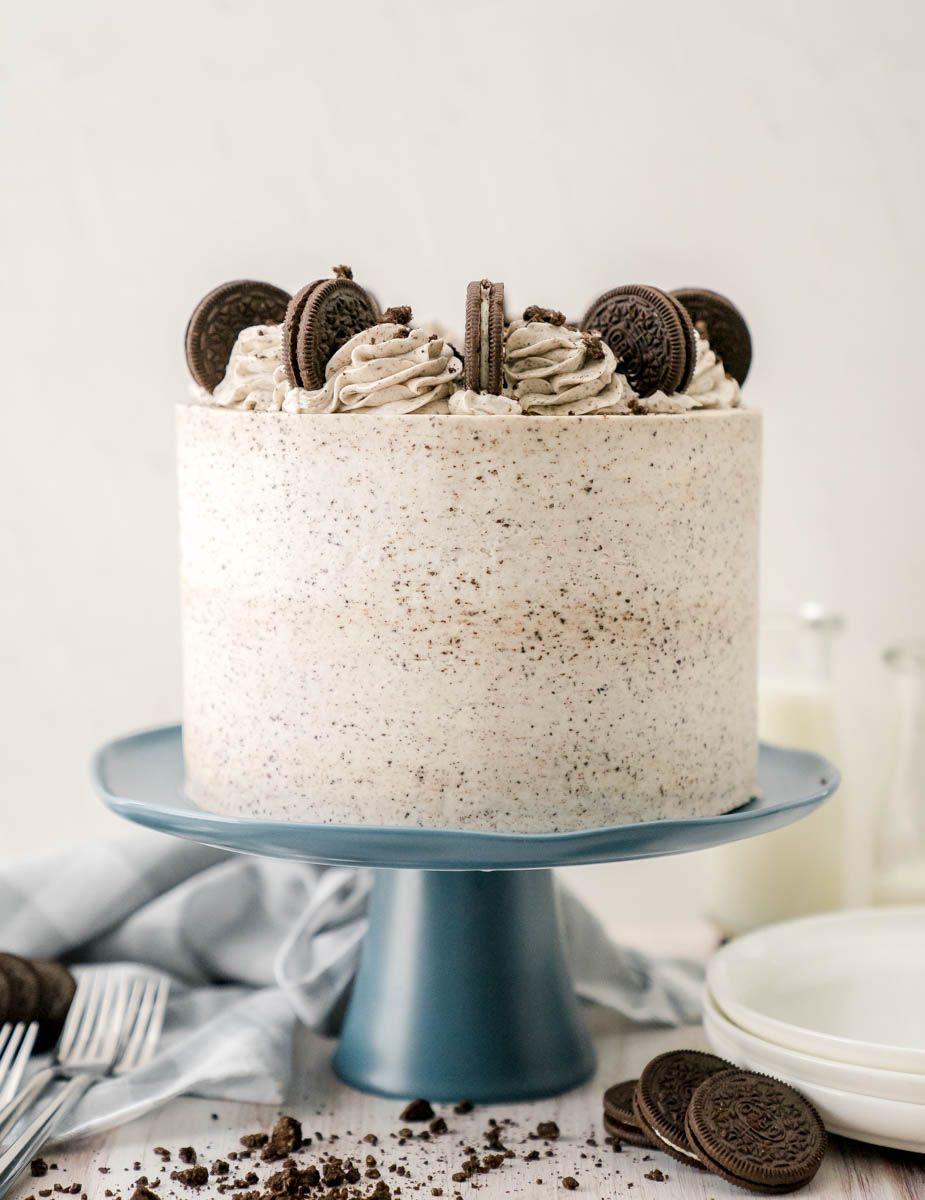
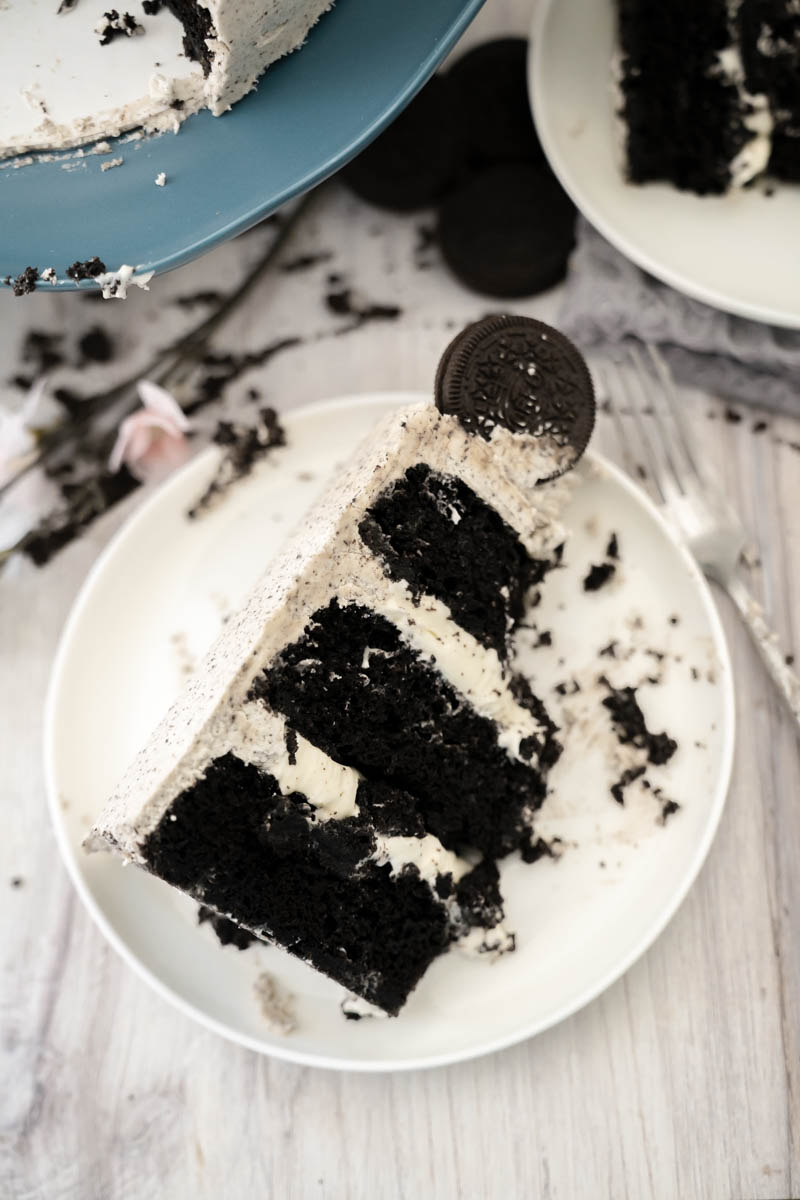
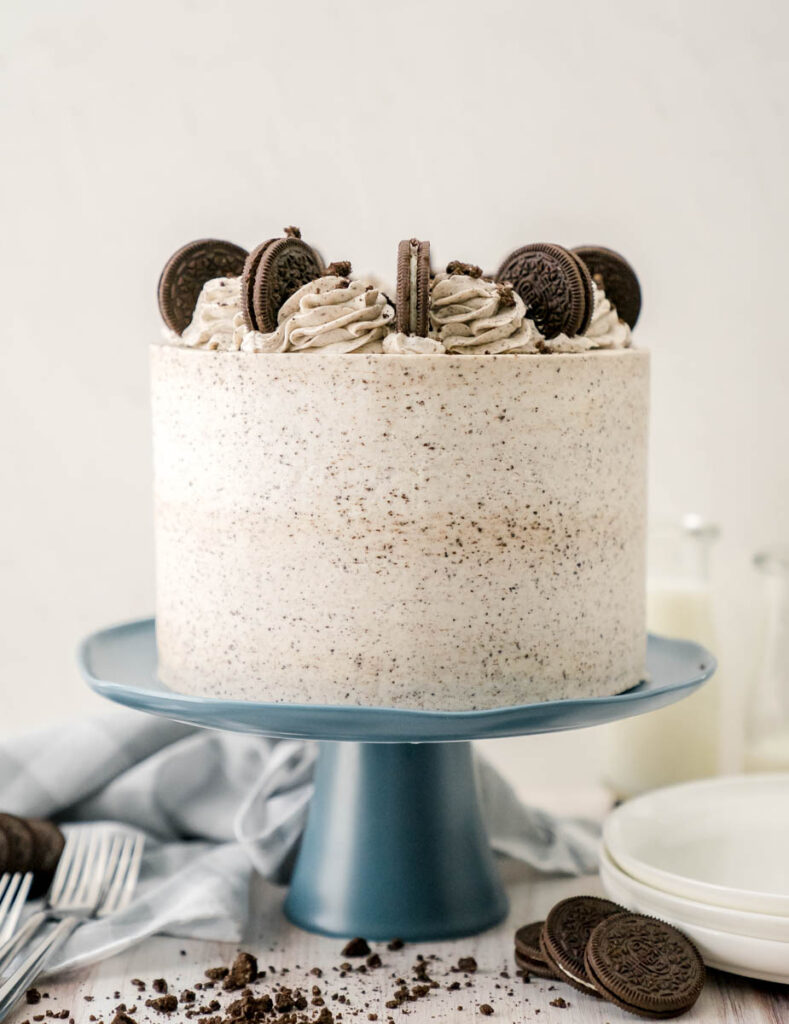
Who is ready for the Ultimate Cookies And Cream Cake? This cake has an Oreo cookie crust, dark chocolate cake layers, cream cheese filling, and an Oreo buttercream.
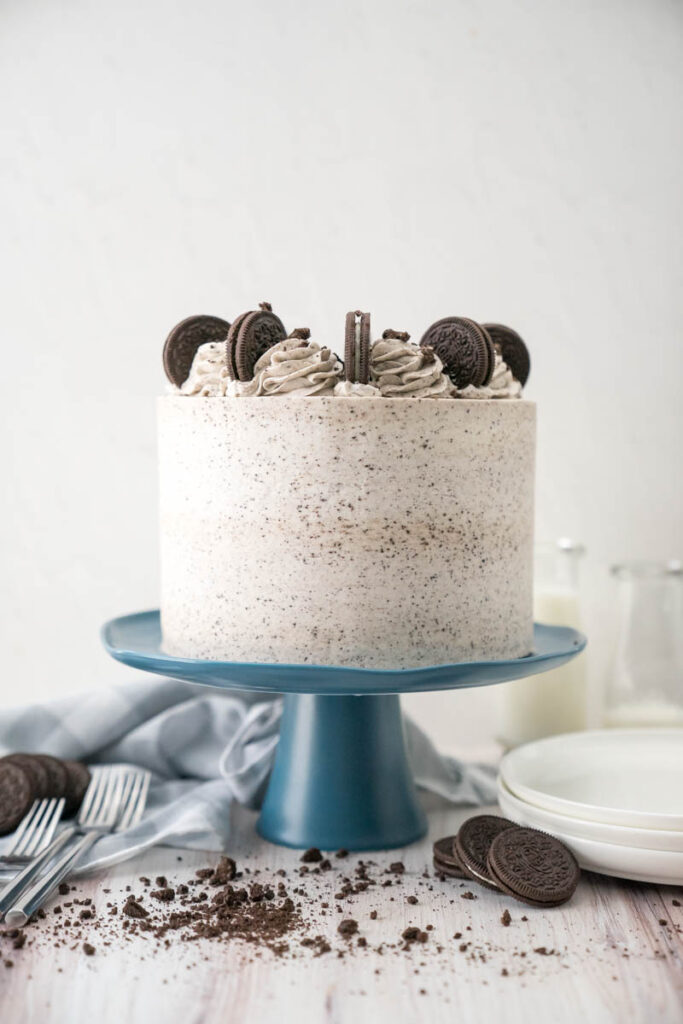
If you are an Oreo lover, like me, you are going to love this cake! It is perfect for any celebration, including a day where you just want to eat cake all by yourself. Trust me, I get it! That’s what I wanted to do with this one too! This cake is Oreo through and through. Just like an Oreo, it’s made with dark chocolate layers and a cream cheese filling.
You will find more recipes like this below:
Bakery Style Oreo Chocolate Chip Cookies
The Best Birthday Golden Oreo Blondies
Jump to:
Why this recipe works
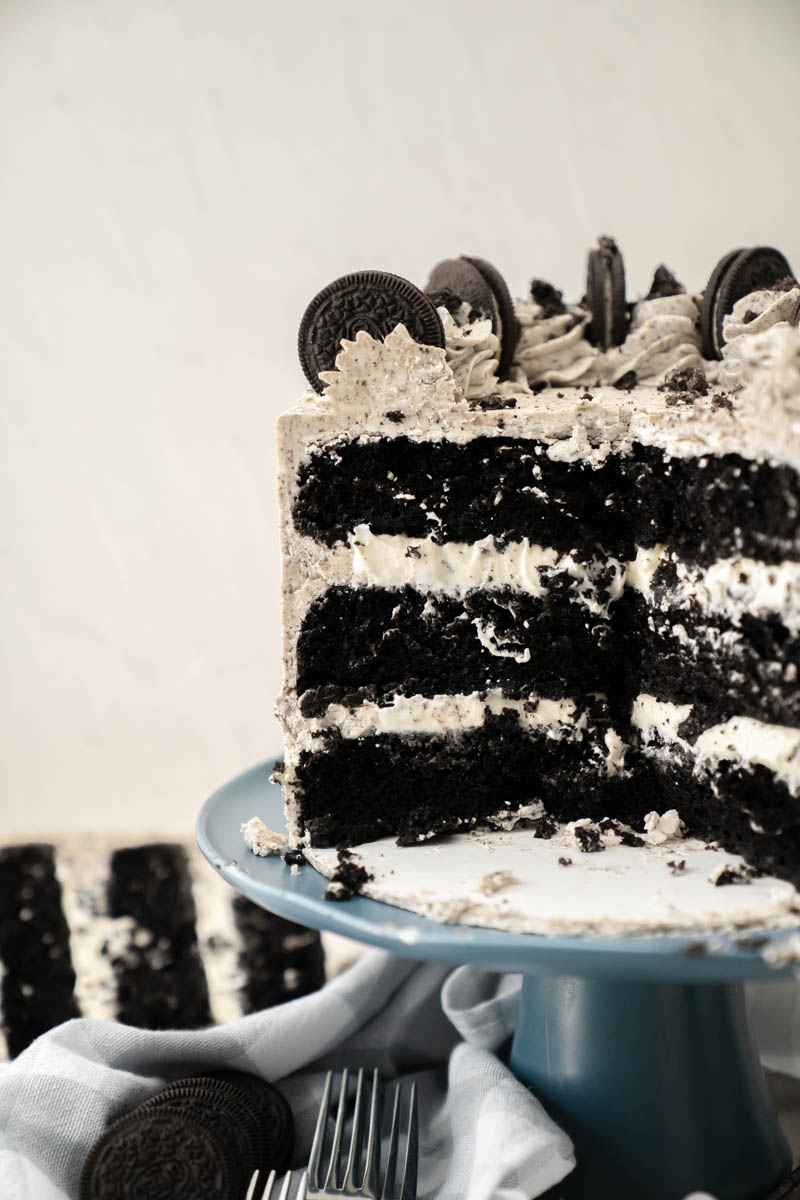
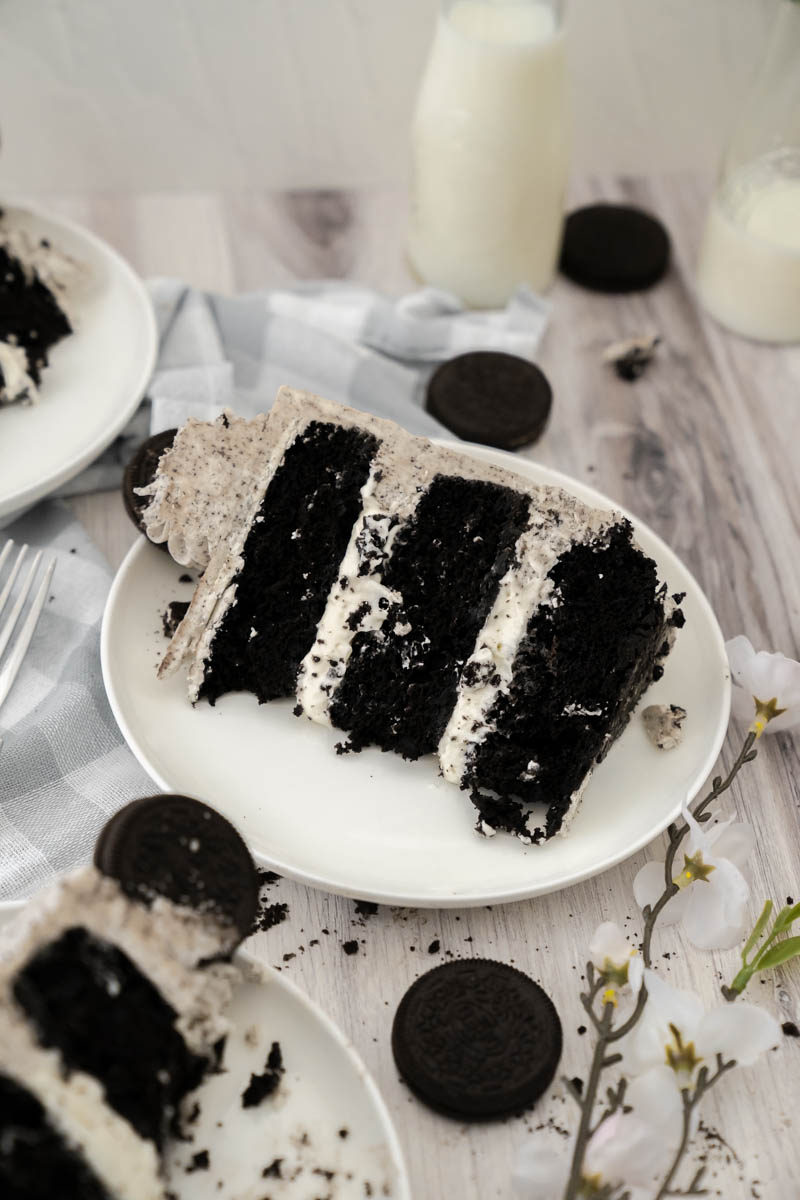
- Dark Chocolate Cake- Did you know that Oreo uses dark cocoa powder for their cookies? I decided to do the exact same thing for this cake.
- Cream Cheese Filling- Whipping cream and cream cheese are two friends that are just meant to be together.
- Oreo Cookie Crust- Just like an Oreo, this crust has a great cookie crunch to it.
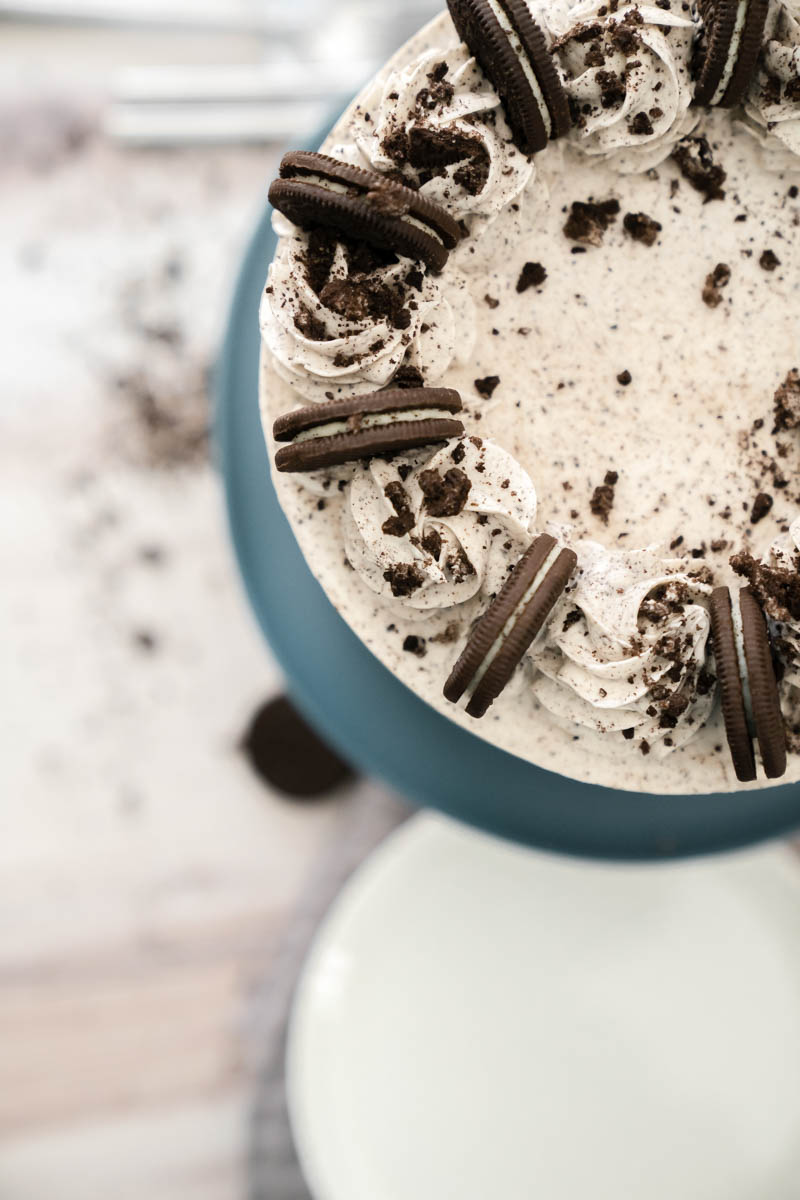
- Oreo Frosting- I don’t like to pick favorites, but this one might be my favorite element of this cake. Who can resist a crunchy Oreo buttercream?
Ingredients you will need:
Here are some ingredients that you might not have on hand, but that you will need for this recipe. For the full list of ingredients, check out the recipe card below.
- Oreos- I feel like this one is pretty obvious. I bought the largest size they had to offer. I think it was called the party pack.
- Unsalted butter- You will need this for both the crust and for the buttercream.
- Eggs- I used large eggs, but you can use extra large as well.
- Cream cheese- You will need a block of cream cheese and you will use ¾ of it. Make sure it’s softened.
- Buttermilk- I like to use full fat buttermilk, but whatever you can find at the store will be fine.
- Oil- I use vegetable oil, but you can also use canola.
- Dark cocoa powder- I use a dark cocoa powder from amazon. You can find the one I use here.
- Fresh leavening agents- Make sure that your baking soda and baking powder are fresh. I change mine out every 6 months!
- Heavy whipping cream- I like to use heavy whipping cream. I like a full fat whipping cream.
Step by Step Instructions- cookie crust
Step 1: Prep your pans. Preheat your oven to 325 degrees F. Spray three 8-inch or four 6-inch round cake pans with cooking spray and then line with parchment paper. Spray again. Set aside.
Step 2: Make Oreo crumbs. Place the Oreo cookies in a food processor or blender and pulse until the Oreos are finely ground.
Step 3: Combined all ingredients. In a medium-sized bowl combine the Oreo crumbs, sugar, and melted butter. Stir until all the Oreo crumbs are moistened by the melted butter. You should be able to scoop it with your hand and have it all stick together.
Step 4: Pour into the pans. Divide the mixture evenly between the pans and press down firmly with your hand or the back of a flat measuring cup.
Step 5: Bake. Bake for 7 minutes. Let cool while you make the cake layers.
Step by step- chocolate cake layers
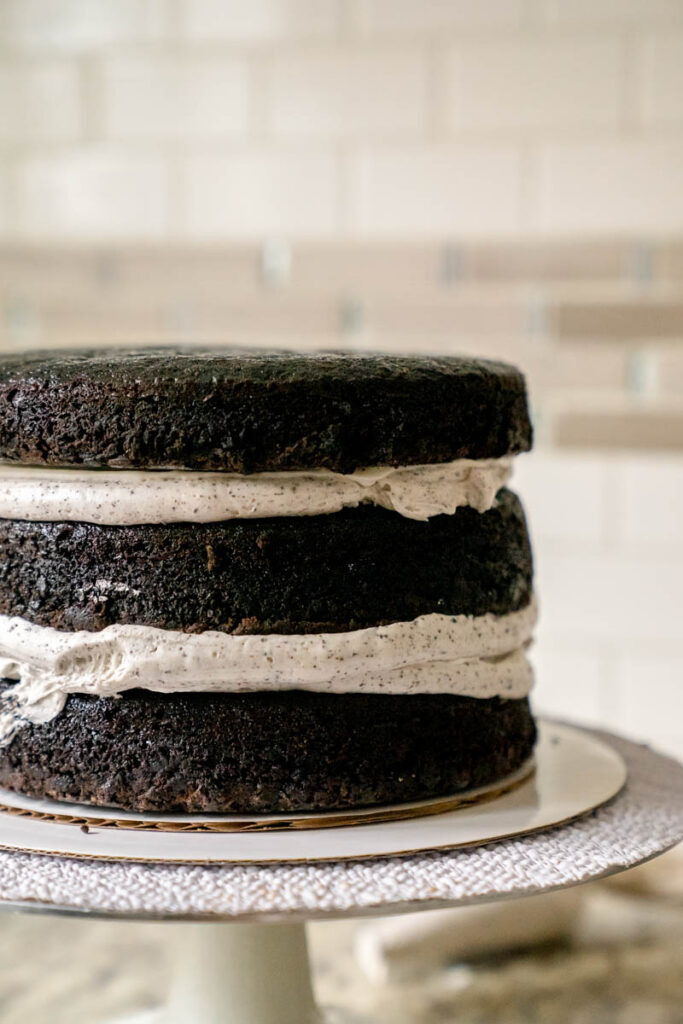
Step 1: Mix all the dry ingredients. In a stand sized mixer fitted with the paddle attachment, combine the flour, sugar, cocoa powder, baking soda, baking powder, and salt. Mix on low until evenly combined.
Step 2: Whisk the wet ingredients. In a small bowl, whisk the eggs, buttermilk, hot water, vanilla extract, and vegetable oil until evenly combined.
Step 3: Mix the dry and the wet ingredients together. With the mixer on the lowest speed, pour the liquid ingredients into the dry ingredients and mix, just until combined. There should be no flour streaks remaining. With a rubber spatula, scrape the bottom of the bowl to make sure the batter is evenly combined.
Step 4: Divide and Bake. Divide the batter evenly between the prepped Oreo crust pans (about 15 ounces in each 8 inch pan) and bake for 30-33 minutes. After they are done baking, let them cool for 15 minutes in the cake pans and then transfer them to a cooling rack and let them finishing cooling there.
Step 5: Level and store the cakes. After the cakes have come to room temperature, level the tops of the cakes, if needed, and then wrap them in plastic wrap and freeze them in preparation for frosting the cake.

Step by step- Cream cheese filling.
Step 1: Beat the cream cheese. In a medium sized bowl, combine the softened cream cheese, powdered sugar, vanilla, and salt. With a hand mixer, start on the lowest speed and mix until it’s all combined. Then turn up the speed and mix until it’s creamy and smooth.
Step 2: Make whipped cream. In the bowl of a stand mixer fitted with the whisk attachment, whisk the heavy whipping cream on high for about 3 to 5 minutes. You want it to be at the stiff peak stage.
Step 3: Fold the cream cheese into the whipped cream. With a rubber spatula, fold in half of the whipped cream until no streaks of whipping cream remain. Repeat with the remaining whipped cream.
Step 4: Store. When you are done, place the mixture in the fridge until you are ready to assemble your cake. It can stay in the fridge, covered, for up 4 hours.
Step by Step- the buttercream
Step 1: Cream the butter. In a stand mixer fitted with a paddle attachment, cream the butter on medium-high speed for about two minutes.
Step 2: Add the powdered sugar. With the mixer on low, add all of the sifted powdered sugar and mix on low, just until incorporated. With a rubber spatula, scrape down the sides of the bowl.
Step 3: Add the rest of the ingredients. Add the heavy cream, salt and vanilla, increase the speed to medium-high and beat the frosting for five minutes. It should get lighter in texture and color.
Step 4: Add the crumbs. With the rubber spatula, lightly stir in the cookie crumbs until you start seeing gray streaks.
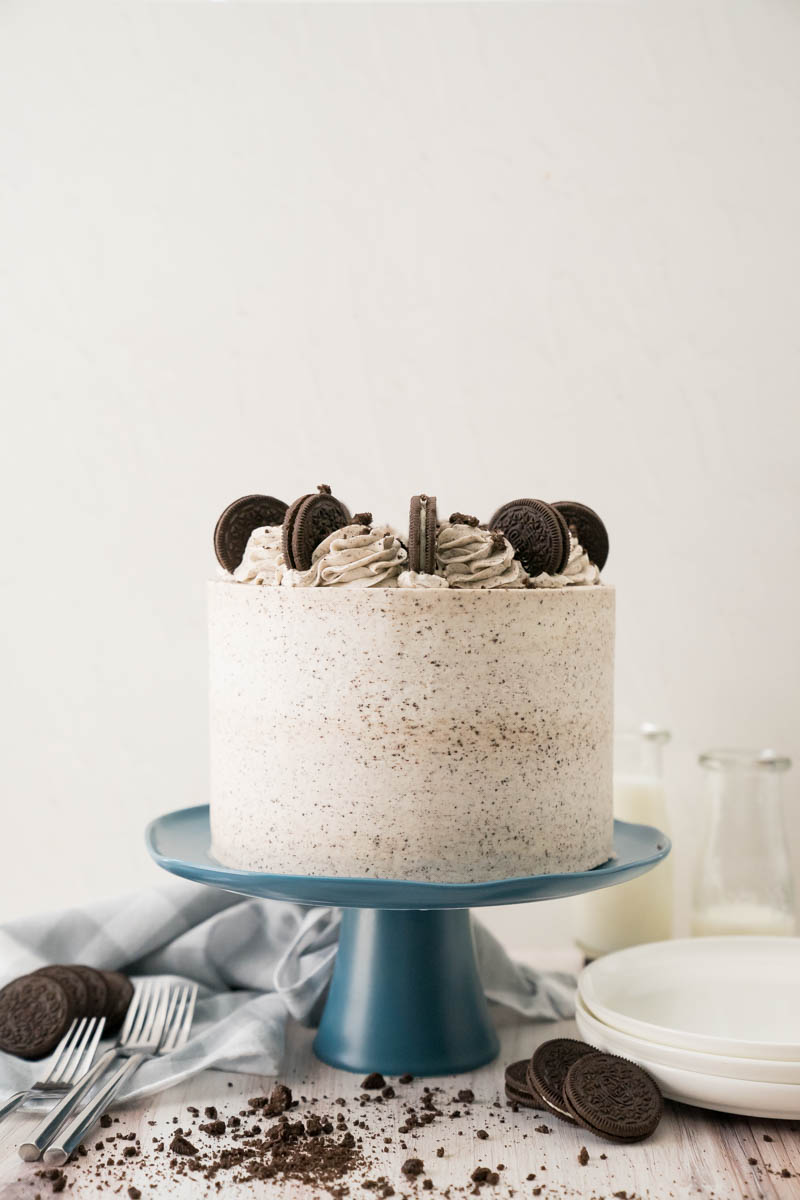
Assembly
- Place the first cake layer, top side up, on the cake board. Pipe a rim of Oreo buttercream around the edge of the cake Fill the center of the cake with the cream cheese filling, make sure not to overfill, I used a little under 1 cup.
- Place the second cake layer, crust side down, on top of the buttercream and filling. Repeat piping and filling.
- Place final cake layer, crust side down on the filling.
- Apple a thin layer of the Oreo buttercream, also known as the crumb coat, and freeze for about 10 to 15 minutes to set this layer of frosting.
- Once the crumb coat is set, continue to frost the cake with the remaining frosting.
Expert baking tips
- When you are making the cake batter, make sure to really cream the butter and the sugar. I can’t stress this enough! This helps create air pockets in your cake layers that also helps it rise.
- Use high quality cake pans. This helps prevent your cake layers from browning on the sides. I always use Fat Daddios cake pans. You can find the ones I use here.
- I say this a lot because I think it’s really important… USE ROOM TEMP ingredients! Making sure all of your ingredients are the same temp is a must!
- To get a creamy and smooth buttercream, add a Tablespoon of whipping cream once you done mixing the buttercream. Then beat by hand with a rubber spatula to get all of the air bubbles out.
- Do a crumb coat. Don’t skip this step. It helps secure the crumbs onto the cake and makes decorating easier.
- Use a turn table to help decorate your cake. You can find the one I use here.
- I love using an offset spatula to help spread the buttercream on the sides of the cake. You can find mine here.
Storing
How to store this Ultimate Cookies In Cream Cake
If I am dividing my cake making into multiple days, I bake my cake layers, cool them, and wrap them with plastic wrap and store them in the fridge or freezer. This help reduce crumbs and makes it so the layers don’t slide around when decorating. They can be stored in the fridge for 3-5 days.
For the filling, make it the same day you are stacking and assembling. It doesn’t hold well. Once you are done making the filling, place it in the fridge to keep cold, and make it stable.
For more cake recipes here are some:
Old Fashion Blueberry Donut Bundt Cake
Down Right The Best Churro S’more Cake
Freezing
If you want to make the entire cake ahead of time, you can freeze the decorated cake by simply wrapping it with plastic wrap. If you want to store it for longer than a few days, put a layer of aluminum foil over the plastic wrap. It can be stored in the freezer like this for up to 6 months. Once you are ready to serve the cake, pull it out of the freezer and place it in the fridge to help decrease condensation.
Recipe
Ultimate Cookies and Cream Cake
Ingredients
FOR THE OREO CRUST
- 2½ cups finely ground Oreo Cookies about 40 cookies
- 2 Tablespoons granulated sugar
- ⅓ cup unsalted butter melted
FOR THE CHOCOLATE CAKE
- 3 eggs room temperature
- 1 cup buttermilk room temperature
- 1 cup hot water
- ½ cup vegetable oil
- 2 cups all-purpose flour spooned and leveled.
- 1 ¾ cups granulated sugar
- ¾ cup dark cocoa powder
- 2 teaspoons baking soda
- 2 teaspoon baking powder
- 1 teaspoon salt
- 1 Tablespoon pure vanilla extract
FOR THE CREAM CHEESE FILLING
- 6 ounces cream cheese completely softened
- 1 cup heavy whipping cream
- 2 cups powdered sugar
- 1 teaspoon pure vanilla extract
- Pinch of salt
FOR THE BUTTERCREAM
- 6 Oreo cookies ground into a fine crumb
- 1 ½ cups unsalted butter slightly cold
- 6 ounces of cream cheese softened
- 6 cups powdered sugar measured and then sifted
- 3 Tablespoons heavy whipping cream
- 1 teaspoon vanilla extract
- Pinch of salt
- This recipe makes just enough to stack and fill a cake if you want to make the dollops on top like mine, I suggest doing an additional half batch.
Instructions
For the Oreo crust
- Preheat your oven to 325 degrees F. Spray three 8-inch or four 6-inch round cake pans with cooking spray and then line with parchment paper. Spray again. Set aside.
- Place the Oreo cookies in a food processor or blender and pulse until the Oreos are finely ground.
- In a medium-sized bowl, combine the Oreo crumbs, sugar and melted butter. Stir until all the Oreo crumbs are moistened by the melted butter. You should be able to scoop it by hand and have it all stick together.
- Divide the mixture evenly between the pans and press down firmly with your hand or the back of a flat measuring cup.
- Bake for 7 minutes. Let cool while you make the cake layers.
For the cake
- Keep your oven at 325 degrees.
- In a stand sized mixer fitted with the paddle attachment, combine the flour, sugar, cocoa powder, baking soda, baking powder, and salt. Mix on low until evenly combined.
- In a small bowl, whisk the eggs, buttermilk, hot water, vanilla extract, and vegetable oil until evenly combined.
- With the mixer on the lowest speed, pour the liquid ingredients into the dry ingredients and mix just until combined. There should be no flour streaks. With a rubber spatula, scrape the bottom of the bowl to make sure the batter is evenly combined.
- Divide the batter evenly between the prepped Oreo crust pans (about 15 ounces in each 8 inch pan) and bake for 35-38 minutes. After they are done baking, let them cool for 15 minutes in the cake pans and then transfer them to a cooling rack and let them finishing cooling there.
- After the cakes have come to room temperature, level the tops of the cakes, if needed, and then wrap them in plastic wrap and freeze them in preparation for frosting the cake.
FOR THE FILLING
- In a medium sized bowl, combine the softened cream cheese, powdered sugar, vanilla, and salt. With a hand mixer, start on the lowest speed and mix until it’s all combined. Then turn up the speed and mix until it’s creamy and smooth.
- In the bowl of a stand mixer fitted with the whisk attachment, whisk the heavy whipping cream on high for about 3 to 5 minutes. You want it to be at stiff peak stage.
- With a rubber spatula, fold in half of the whipped cream until no streaks of whipping cream remain. Repeat with the remaining whipped cream.
- When you are done, place in the fridge until you are ready to assemble your cake. It can stay in the fridge, covered, for up 4 hours.
FOR THE BUTTERCREAM
- In a stand mixer fitted with a paddle attachment, cream the butter and cream cheese on medium-high speed for about two minutes.
- With the mixer on low speed, add all of the sifted powdered sugar at once and mix on low just until incorporated. With a rubber spatula, scrape down the sides of the bowl.
- Add the heavy cream, salt and vanilla, increase the speed to medium-high and beat the frosting for five minutes. It should get lighter in texture and color.
- With the rubber spatula, gently stir in the cookie crumbs until you start seeing gray streaks.
ASSEMBLY
- Place the first cake layer top side up on the cake board. Pipe a rim of Oreo buttercream around the edge of the cake. Fill the center of the cake with the cream cheese filling, making sure not to over fill, I used a little under 1 cup.
- Place the second cake layer, crust side down, on top of the buttercream and filling. Repeat piping and filling.
- Place final cake layer, crust side down, on the filling.
- Apple a thin layer of the Oreo buttercream, also known as the crumb coat, and freeze for about 10 to 15 minutes to set this layer of frosting.
- Once the crumb coat is set, continue to frost the cake with the remaining frosting.

Cecilia says
Do you put cream cheese in the buttercream? It’s listed on the ingredients for the buttercream but is not listed in the instructions for making the butter cream.
Molly Murphy says
Yes! You do! I will add that to the instructions!
Thank you!
Kindel R Randolph says
I am making a 2 tier 6 inch tall cake for my son’s birthday. Each tier will be 3 layers. I plan on using dowels for support. Since there is a filling in this cake, do you think it will be sturdy enough to use?
Kindel R Randolph says
I am making a 2 tier 6 in cake for my son’s birthday. Each tier will have 3 layers. I plan on using dowels for support. Since this cake has a filling, do you think it will be sturdy enough to use for a tall cake?
Molly Murphy says
Yes I do! I would just make sure the cake layers and filling are cold while you stack it!
Mery A says
Hiii how long does this last in room temp, cause i see that you also you creamcheese and whipping cream?
Molly Murphy says
Food safety says no more than 4 hours!
Terri Lee Maddox Bolt says
In the cake instructions you mentioned creaming the butter and sugar. But there is no measurement given in the ingredient list for butter in the cake. How much butter at room temperature is supposed to go in the chocolate cake?
Molly Murphy says
Oh shoot! No butter is suppose to go in! I can update that!
Rayza says
I baked the cakes at 325 for 30 min and the timer just went off and the cakes are not close to being done.
Molly Murphy says
That is frustrating! All ovens are different, so it wont hurt the cakes to pop them in an extra 5-10 minutes
Sarah says
I only have 9″ cake pans. Can I use these instead of the 8″ recommended pans or will the recipe need to be altered?
Molly Murphy says
Yes, you can use 9-inch cake pans! Just keep in mind the layers will be a bit thinner than with 8-inch pans, so I recommend making a little extra crust to ensure it fully covers each pan. Also, check for doneness a few minutes earlier since the layers might bake a bit faster. Happy baking!
Dana Johnson says
I made this cake for my son’s birthday. It certainly is time consuming but your directions are very helpful considering I have never made my own cake from scratch. My family loved it! It is delicious, however, the sheer amount of ingredients makes it expensive and concerning. I ran the recipe through a nutrition analyzer and figured I would share its estimates for any who are curious:
Here is the approximate nutritional breakdown for the entire recipe:
Calories: 12,212
Carbohydrates: 1,992 g
Protein: 100 g
Fat: 457 g
Sugar: 1,515 grams
This says 18 servings but those are fairly thin slices. Even so, this amounts to:
Calories: 678.44
Carbohydrates: 110.64 g
Protein: 5.56 g
Fat: 25.36 g
Sugar: 84 g