I’m reliving my childhood by creating my newest recipe, Peanut Butter and Jelly Cake. If I’m being honest, as an adult I still eat peanut butter and jelly sandwiches weekly! It’s something so simple and nostalgic that it just makes the harder days of adulting much more enjoyable.
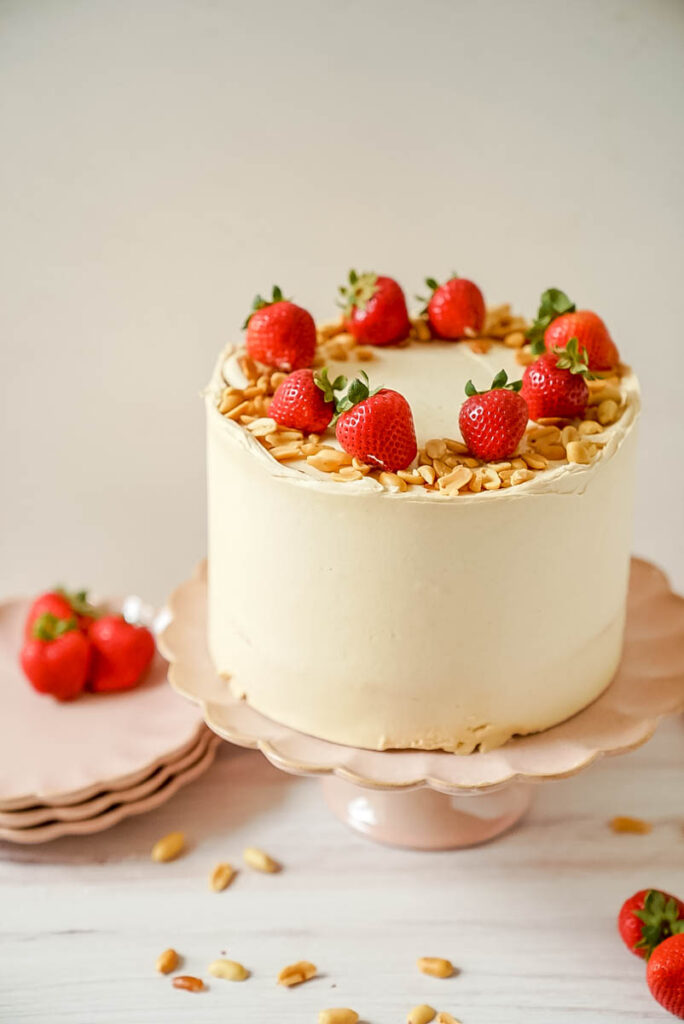
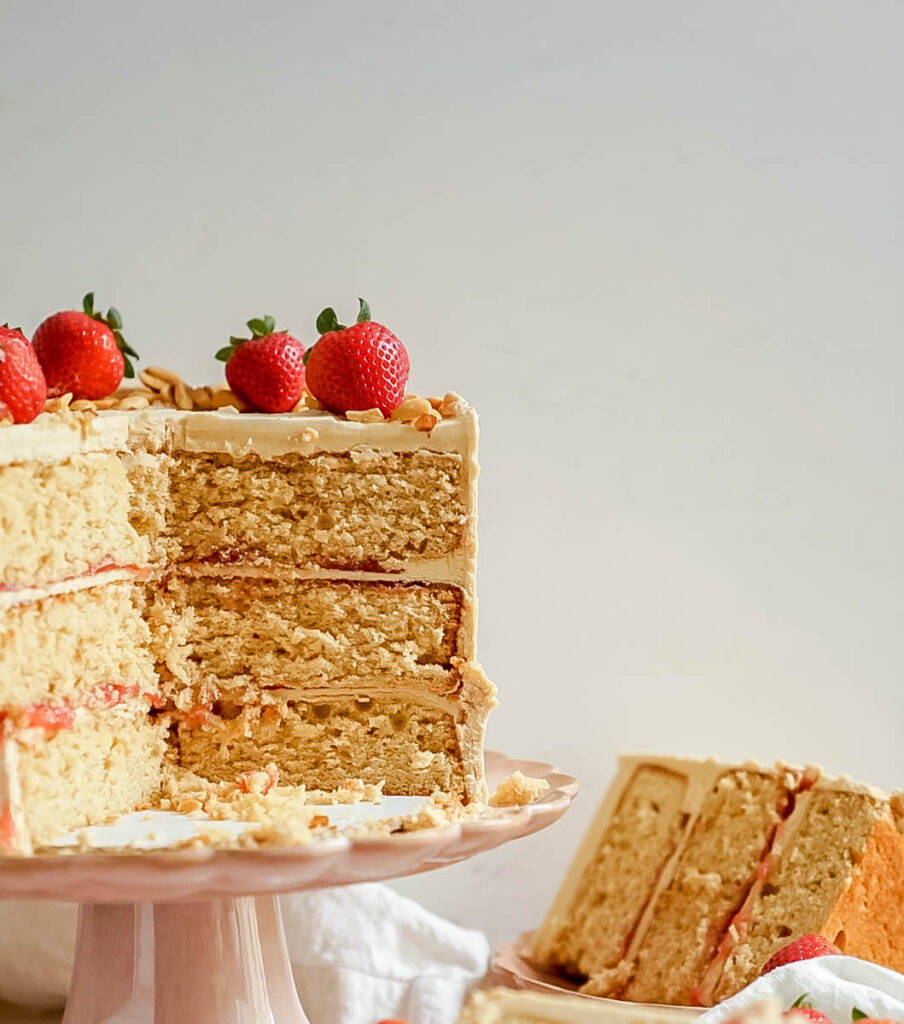
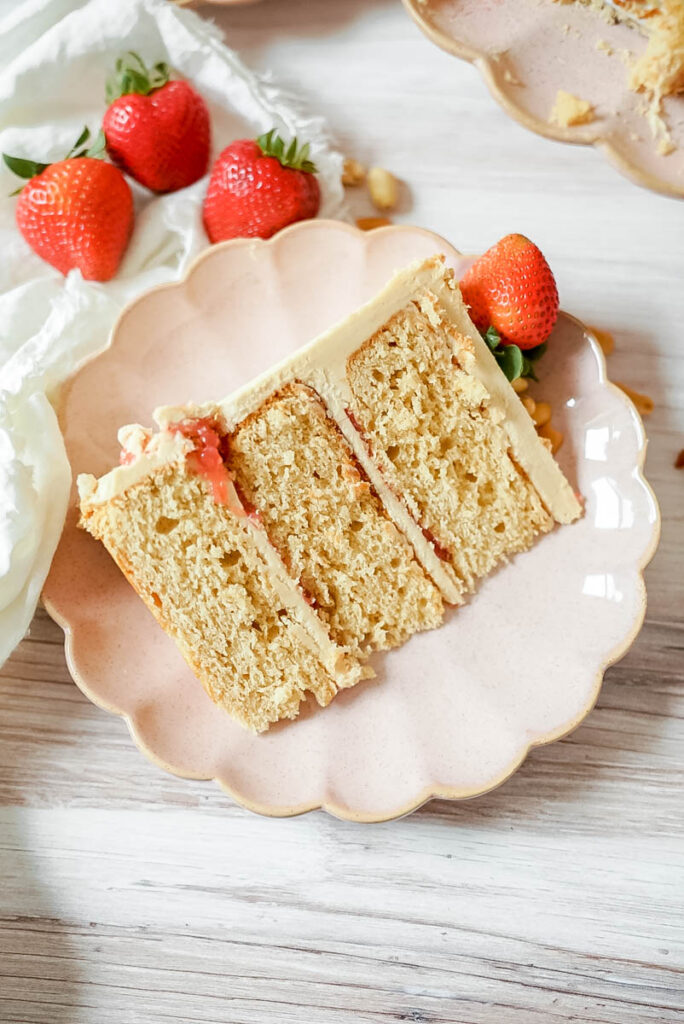
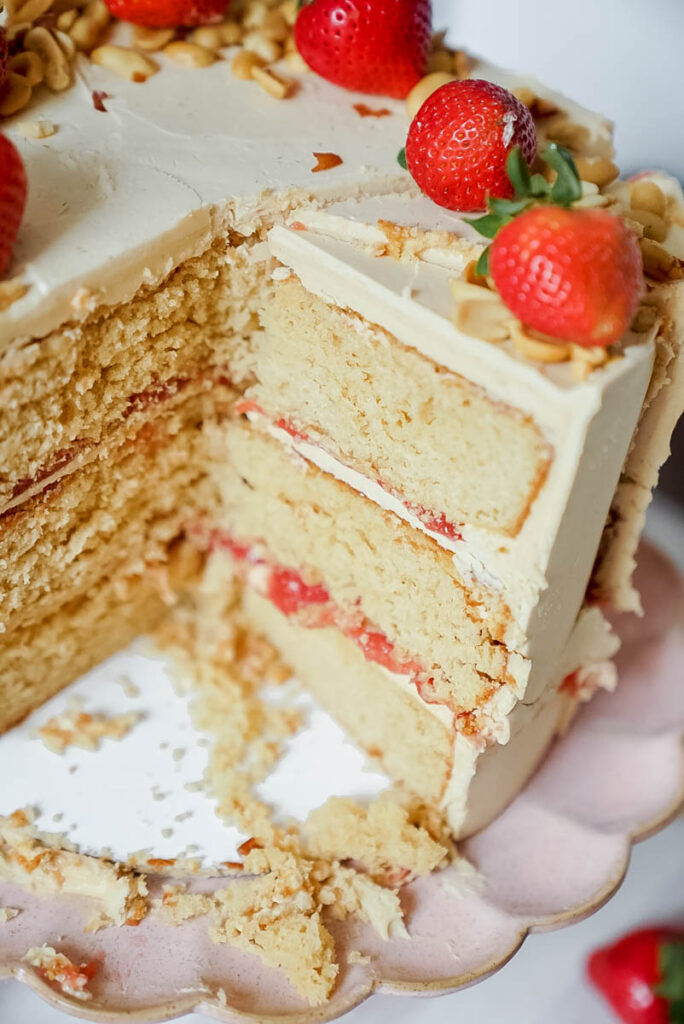
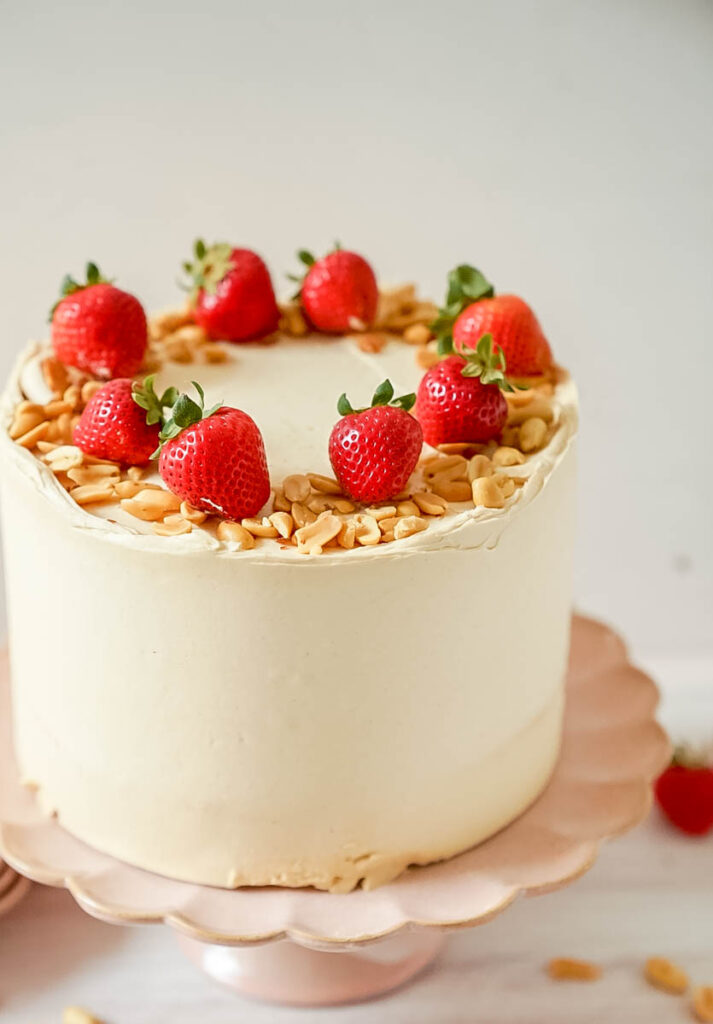
This Peanut Butter and Jelly Cake has tender creamy peanut butter cake layers with a hint of cinnamon and nutmeg. Then it’s filled with a homemade strawberry jam and frosted in a very creamy peanut butter frosting.
If you love peanut butter, you will love these recipes
Chocolate Cake With Peanut Butter Frosting, Snickers Cake
Why you will love this recipe:
- Layered cake- This cake has three 8-inch layers, but you can totally do four 6-inch layers, if you prefer. My favorite pans are the high quality ones from fat daddios.
- Peanut butter cake layers- These ultra soft and creamy cake layers are filled with a cinnamon and nutmeg spice.
- Homemade jam- I use fresh or frozen strawberries to make my homemade jam, but you can totally use a store bought jam, if you want to speed up the process.
- Peanut butter frosting- I have tried out so many different peanut butter frostings, but I feel like I finally have it perfected with this recipe. I use Jif peanut butter for my frosting because I feel like it’s the creamiest.
Grocery list
Here are some pantry items that you may not have on hand. For a full list of ingredients, check out the recipe card below.
- Cake flour- Because we are going for a silky smooth cake, I use cake flour in this recipe.
- Ground nutmeg- I use ground nutmeg for a great flavor addition to the peanut butter.
- Large eggs- You should pull these out 2-4 hours before you start baking to bring them to room temperature.
- Unsalted butter- As always, I use unsalted butter to help control the amount of salt in my recipes.
- Smooth peanut butter- I always use Jif. It’s my favorite.
- Buttermilk- Just like the eggs, this needs to be at room temperature. Pull it out ahead of time.
- Strawberries- You can use frozen or fresh, I used frozen this time because that’s what I had on hand.
- Jam (optional)- If you decide not to make your own jam, you can totally use a store bought jam.
Step by step instructions for cake layers.
Here is a summary of how to make the cake batter. For the full list of instructions, please refer to the recipe card below. I use my favorite brand of cake pans that you can find here. I also use parchment paper which is also found here.
Step 1: Sift the dry ingredients. In a medium sized bowl, whisk together the flour, baking powder, salt, nutmeg and cinnamon.
Step 2: Cream the butter, peanut butter, and sugars. This is so important because this base is what is going to give your cake its structure. I cream the ingredients for 5 minutes, scraping the sides and the bottom of the bowl halfway through.
Step 3: Add the eggs and vanilla. Add the eggs, one at a time, beating for 30 seconds after each addition and scraping the bottom and the sides of the bowl after each addition. Add the vanilla and mix on low.
Step 4: Mix the dry ingredients with the wet ingredients. Add in half of the dry ingredients and half of the buttermilk, mix on low just until incorporated or until almost no flour streaks remain. Repeat this step. With a rubber spatula, scrape the bottom of the bowl to make sure the batter is fully incorporated.
Step 5: Pour and bake the batter. Pour the batter into your prepped cake pans. I use a kitchen scale to make sure it’s evenly divided, but if you don’t have a kitchen scale, just eyeball it.
Step 6: Bake the cake layers. Bake the cake layers for 30-35 minutes. It took mine 31 minutes.
Step 7: Cool and transfer the cake layers. Once the cake layers are done baking, let them cool for 15 minutes in the cake pans and then transfer them out of the cake pans and onto a cooling rack.
Step by step instructions for the jam
Making a homemade jam is totally optional, although I highly recommend it.
Step 1: Cook the mixture. In a medium sized sauce pan, add strawberries, lemon juice, and sugar and stir well. Cook on medium heat for about 4-5 minutes stirring every so often. Strawberries should start to get tender at this point and they should release their sugar.
Step 2: Blend the strawberries. Once the strawberries have released all the sugar and the mixture has a more liquid consistency, place the hot mixture in a blender or use an immersion blender to create a smooth mixture.
Step 3: Boil the mixture again. Return the hot mixture to the sauce pan and turn the heat to medium. Let it come to a low boil.
Step 4: Make a corn starch slurry. Dissolve the cornstarch in the water to make a slurry.
Step 5: Add the slurry. Now slowly add in the slurry with one hand and mix the filling continuously with the another hand. The slurry is activated once the mixture is hot enough, so make sure your strawberry mixture is hot. Within a few seconds, the strawberry filling will start to thicken.
Step 6: If the mixture is too thick. If it is too thick then add ¼ cup water and cook for another minute or two.
Step by step for the buttercream
Step 1: Cream the butter and peanut butter. In the bowl of an electric stand mixer fitted with the paddle attachment, beat the butter and peanut butter. Beat on medium-high speed until smooth, about 2 minutes.
Step 2: Add the rest of the ingredients. Add the powdered sugar to the bowl then add the heavy cream and mix on low just until incorporated, then increase the mixer speed to medium high. Add in the vanilla extract and salt, and continue to beat on high until very fluffy, about 4-5 minutes, scraping down the sides of the bowl as needed.
Step 3: Remove the air bubbles. To remove air bubbles from the frosting, use a wooden spoon or a rubber spatula to stir and push out the air bubbles.
Hint. If you want to do more piping on top of the cake, I suggest making an additional half batch.

Tips for assembling the cake:
- Level your cakes, if needed. Place your first layer top side up on the cake board.
- Spread about ½ cup of the peanut butter buttercream on the cake and with more of the peanut butter buttercream, pipe a border around the edge of the cake to create a wall. Fill the wall with about ½ cup strawberry jam and carefully spread it around. Make sure you don’t add too much jam or the cake will be unstable as you continue to stack and frost.
- Place the second layer top side down on top of the strawberry jam and repeat step one.
- Place the third layer of cake, bottom side up, on the second layer and spread a thin layer of frosting around the entire cake to create a crumb coat. Freeze the cake for 10 to15 minutes to set the crumb coat.
- After the crumb coat is set, continue to frost the cake with the remaining frosting.
- Let the cake come to room temperature before serving. Refer to my storing instructions in my blog post for optimal storing.
Storing and freezing
If I am dividing my Peanut Butter and Jelly Cake making into multiple days, I bake my cake layers, cool them, and wrap them with plastic wrap and store them in the fridge or the freezer. This helps reduce crumbs and makes it so the layers don’t slide around when decorating. They can be stored in the fridge for 3-5 days.
Freezing
If you want to make the entire cake ahead of time, you can freeze the decorated cake by simply chilling it and then wrapping it with plastic wrap. If you want to store it for longer than a few days, put a layer of aluminum foil over the plastic wrap. It can be stored like this in the freezer for up to 6 months. Once you are ready to serve the cake, pull it out of the freezer and place it in the fridge to thaw (this will help decrease condensation).
Here are more recipes you are going to want to try:
Cinnamon Roll Caramel Cake, Brown Butter Chocolate Chip Cookies, Graham Cracker S’mores Cake
Recipe
Peanut Butter and Jelly Cake
Ingredients
For the cake
- 3 cups cake flour
- 1 Tablespoon baking powder
- 1 teaspoon salt
- 1 teaspoon ground cinnamon
- Pinch of ground nutmeg
- 1 cup unsalted butter at room temperature
- 1 cup creamy peanut butter
- ¾ cup granulated sugar
- 1 cup brown sugar, packed
- 4 eggs at room temperature
- 1 cup buttermilk at room temperature
- 1 Tablespoon vanilla extract
For the strawberry jam
- 3 cups fresh or frozen strawberries
- ⅓ cup sugar
- 2 teaspoons lemon juice
- 2 Tablespoons cornstarch
- 5 Tablespoons water
- ¼ cup water only if the filling is very thick
For the peanut butter buttercream
- 5 cups powdered sugar, measured and then sifted
- 1 ½ cups unsalted butter, slightly chilled
- 1 cup creamy peanut butter, 250 grams
- 1 Tablespoon pure vanilla extract
- ¼ cup heavy whipping cream
- Pinch salt
Instructions
For the cake
- Preheat oven to 325 degrees F. Spray three 8-inch pans with cooking spray, line the bottoms with parchment paper and spray again. Set aside.
- In a medium sized bowl, whisk together the flour, baking powder, salt, nutmeg and cinnamon. Set aside.
- In the bowl of a stand mixer fitted with a paddle attachment, cream together the butter and peanut butter until smooth and creamy. Add in the sugar and cream for about 5 minutes on medium speed.
- On low-medium speed, add the eggs, one at a time, beating for 30 seconds after each addition, and scraping the bottom and the sides of the bowl after each addition. Add the vanilla and mix on low.
- Add in half of the dry ingredients and half of the buttermilk. Mix on low just until incorporated or until almost no flour streaks remain. Repeat this step. With a rubber spatula, scrape the bottom of the bowl to make sure the batter in fully incorporated.
- With a kitchen scale, evenly divide the batter between the prepped cake pans and bake for about 30 to 35 minutes, or until a toothpick inserted in the center of the cake comes out clean.
- Once the cakes are done, let them cool them for 10-15 minutes before transferring the cakes from their pans onto a wire rack to finish cooling completely.
For the Jam
- In a medium sized sauce pan, add strawberries, lemon juice, sugar, and stir well. Cook on medium heat for about 4-5 minutes, stirring every so often. Strawberries should start to get tender at this point.
- Once the strawberries have released all their sugar and the mixture has a more watery consistency, place the hot mixture in a blender or use an immersion blender to create a smooth mixture.
- Return the hot mixture to the sauce pan and turn the heat to medium, let it come to a low boil.
- In the meantime, dissolve water in the cornstarch to create a slurry.
- Now slowly add in the slurry with one hand and mix the filling continuously with another hand.
- The slurry will be activated and start to thicken once the mixture is hot enough, so make sure your strawberry mixture is hot.
- Within a few seconds, the strawberry filling will start to thicken.
- If it is too thick, add ¼ cup water and cook for a minute or two more.
For the buttercream
- In the bowl of a stand mixer fitted with the paddle attachment, beat the butter and peanut butter. Beat on medium-high speed until smooth, about 2 minutes.
- Add the powdered sugar to the bowl. Next, add the heavy cream and mix on low until incorporated, then increase the mixer speed to medium high. Add in the vanilla extract and salt and continue to beat on high speed until very fluffy, about 4-5 minutes, scraping down the sides of the bowl as needed.
- To remove air bubbles from the frosting, use a wooden spoon or a rubber spatula to stir and push out the air bubbles.
assembly
- Level your cakes, if needed. Place your first cake layer top side up on the cake board. Spread about ½ cup of the peanut butter buttercream on the cake and with more of the peanut butter buttercream, pipe a border around the edge of the cake to create a wall. Fill the wall with about ½ cup strawberry jam and carefully spread it around. Make sure you don’t add too much jam or the cake will be unstable as you continue to stack and frost.
- Place the second layer top side down on top of the strawberry jam and repeat step one.
- Place the third layer of cake, bottom side up, on the second layer and spread a thin layer of frosting around the entire cake to create a crumb coat. Freeze the cake for 10 to 15 minutes to set the crumb coat.
- After the crumb coat is set, continue to frost the cake with the remaining frosting.
- Let the cake come to room temperature before serving. Refer to my storing instructions in my blog post for optimal storage.

Leave a Reply