
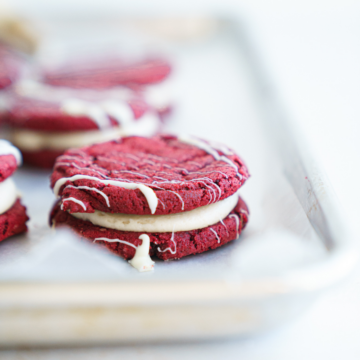
Red Velvet Cookie Sandwiches – Soft, chewy cookies with a chocolatey flavor, filled with tangy cream cheese frosting drizzled with white chocolate on top!
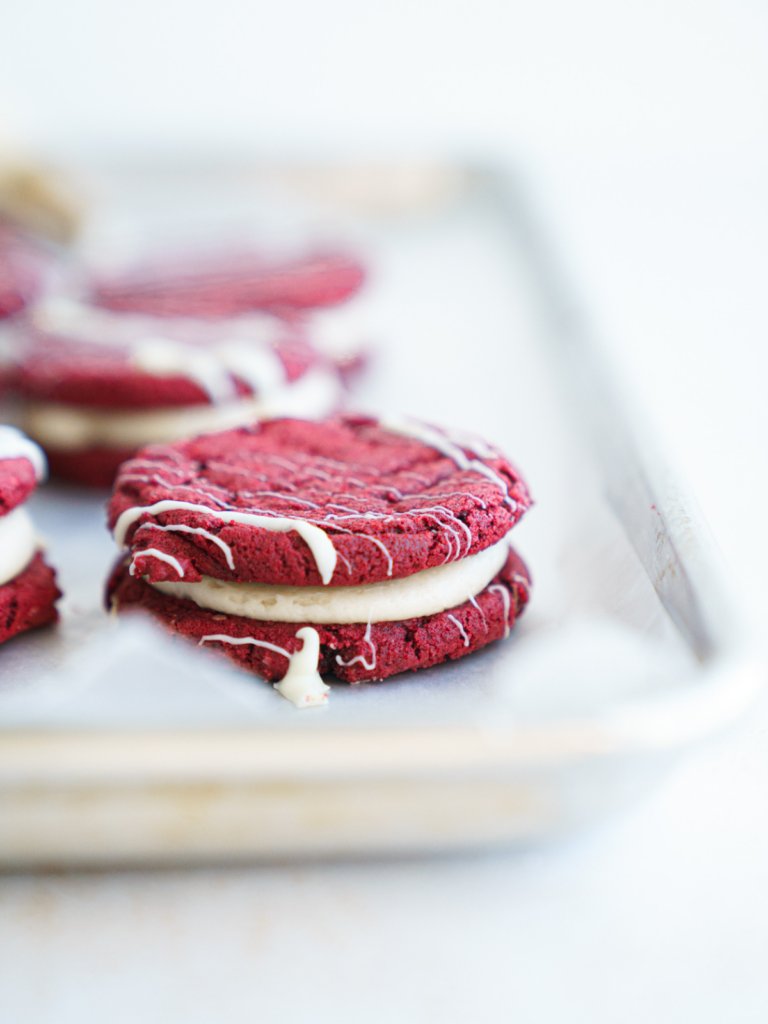
Let’s talk about Red Velvet Cookie Sandwiches—soft, chewy cookies with a chocolatey kick, all wrapped around a tangy cream cheese frosting. They’re the kind of treat that feels fancy but takes barely any effort. Whether it’s for Valentine’s Day, a holiday cookie tray, or just a Tuesday (because why not?), these cookies are a total game-changer.
- Best Double Chocolate Cookie Sandwiches Recipe
- Best Chocolate Birthday Cookies With Frosting
- Levain Copycat Caramel Coconut Chocolate Chip Cookie
Why You’ll Love This Red Velvet Cookie Sandwiches
- **Best tasting: **Soft and chewy cookies with just the right amount of chocolate flavor.
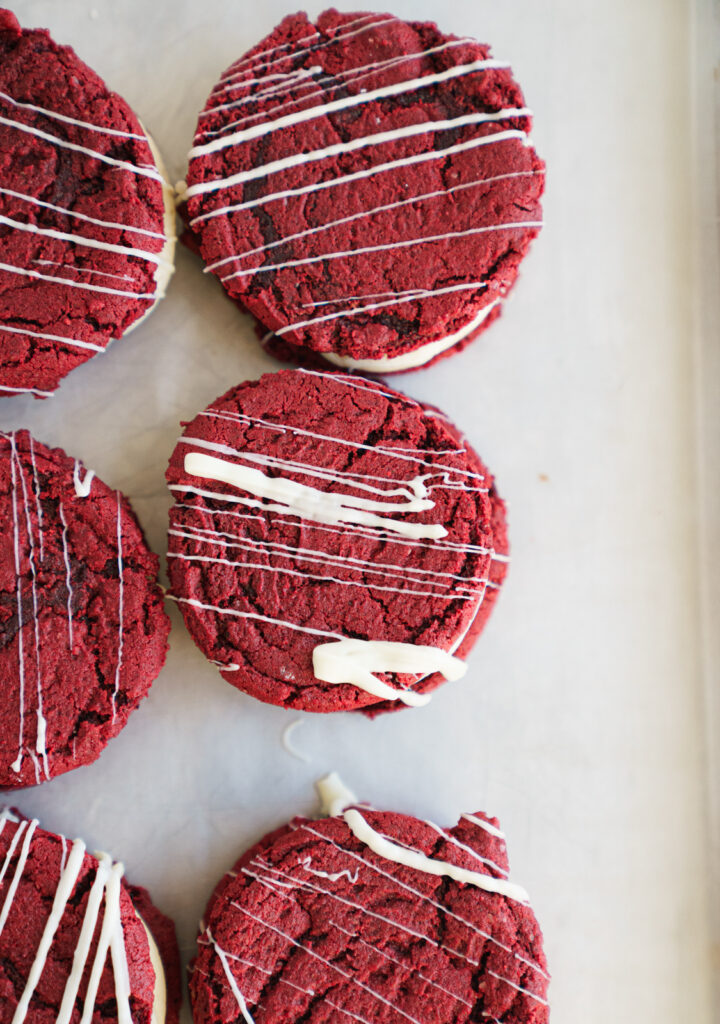
- Gorgeous red color that’s perfect for any festive occasion.
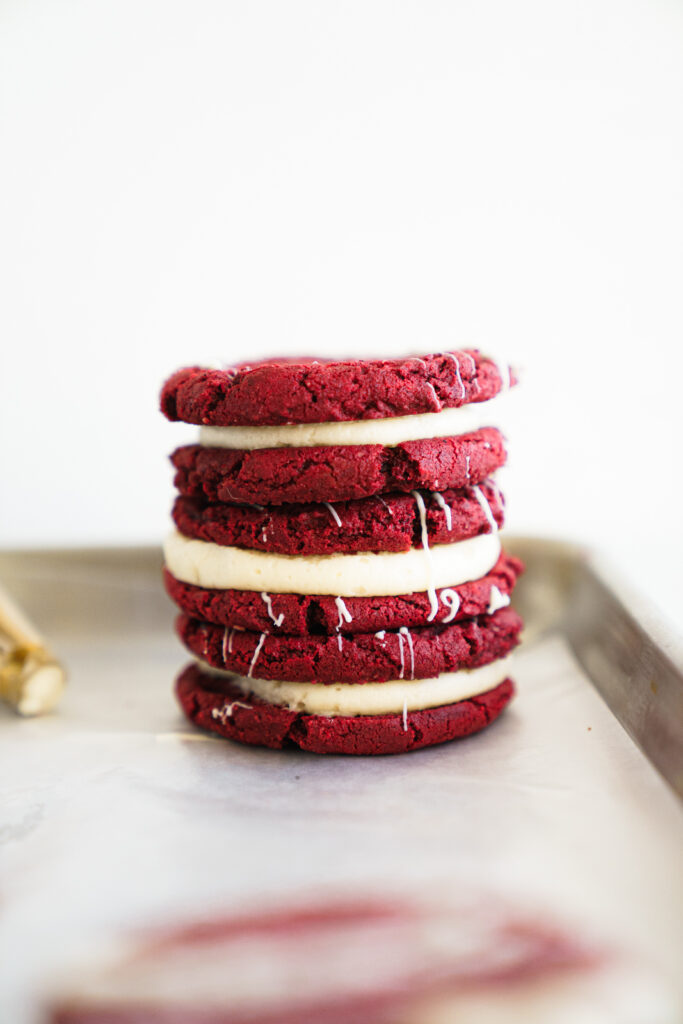
- Filled with a tangy, sweet cream cheese frosting—hello, whoopie pie vibes!
- Made with simple, staple ingredients that you probably already have.
- Minimal effort for maximum deliciousness. Any baker at any level can make!
Ingredients – Red Velvet Cookie Sandwiches
- Unsalted butter – Remember to use room temp, and always unsalted!
- Light brown sugar- You can dark brown, but your cookies might out a different color!
- **Granulated sugar – this one seems pretty self explanatory haha!
- Large egg and egg yolk – make sure these are room temp!
- Vanilla extract– In this day of age, do what you can afford. I like the high quality stuff, but I never sleep on vanilla flavoring!
- LorAnn’s Red Velvet Emulsion (or red food coloring) – this one isn’t a must, but i highly higly recommend. You can get it on Amazon, but I got it for pretty cheap at Hobby Lobby!
- ****Natural unsweetened cocoa powder – ** ** use regular cocoa powder, not dark!
- All-purpose flour – Remember to spoon and level it!
- Baking soda – It is important to make sure it is fresh! I like to refresh mine every 6 months if possible!
- Cream cheese – Make sure it is whole fat and not light, and for a clump free buttercream, let it get up to room temperature!
Step-by-Step Instructions
For the Cookie Dough
- Preheat your oven to 350°F (180°C). Line large baking sheets or a cookie sheet with parchment paper.
- In a large mixing bowl, cream together the unsalted butter, brown sugar, and white sugar using an electric mixer on medium speed until light and fluffy.
- Add the egg, then the egg yolk, mixing on low speed after each addition. Scrape down the sides of the bowl of a stand mixer to keep everything evenly mixed.
- Stir in the red velvet emulsion (or red food coloring) and vanilla extract until combined.
- In a separate bowl, whisk together the dry ingredients: natural cocoa powder, all-purpose flour, baking soda, and salt. Gradually add this to the wet ingredients, mixing on low speed until a thick dough forms. Don’t overmix—we’re going for soft cookies here!
- Using a small cookie scoop, portion out balls of dough onto the prepared baking sheets, spacing them evenly. This dough is thick, so don’t worry—that’s how it’s supposed to be.
- Bake cookies for 10-11 minutes, or until the edges are set and the centers are slightly soft. If needed, flatten them gently with the bottom of a cup to make the perfect sandwich shape.
- Cool on the baking sheet for 5 minutes, then transfer to a wire rack to cool completely.
For the Cream Cheese Filling
- In a large bowl, beat softened cream cheese and butter on high speed until smooth and creamy.
- Add powdered sugar, vanilla extract, and a pinch of salt. Mix on medium speed until light and fluffy. If it’s too thick, add a bit of milk to loosen it up.
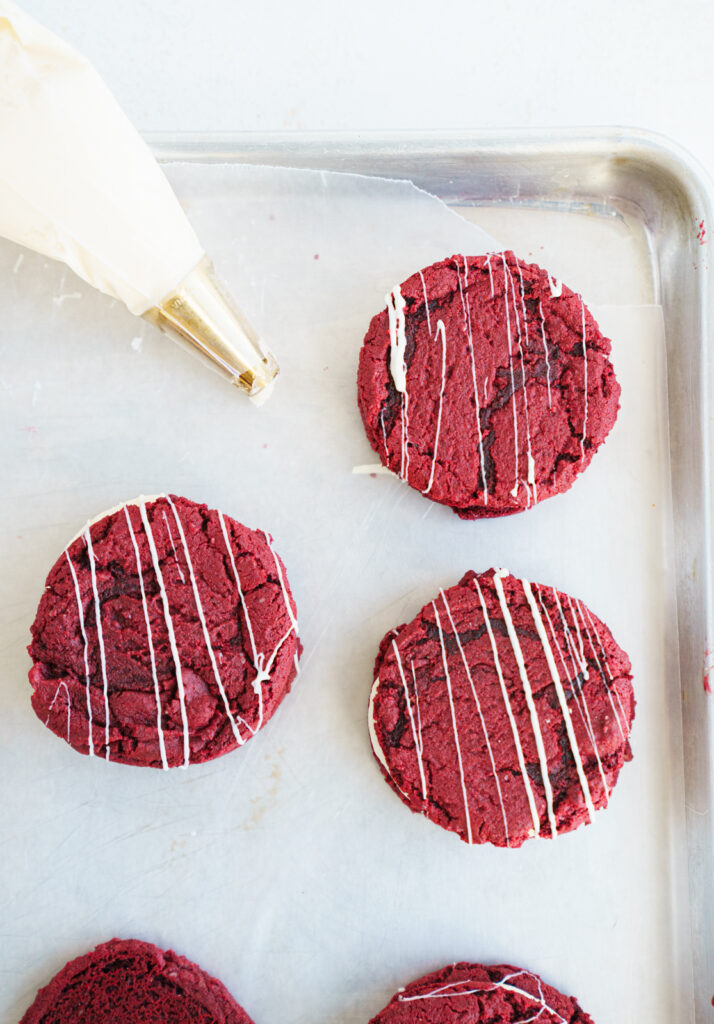
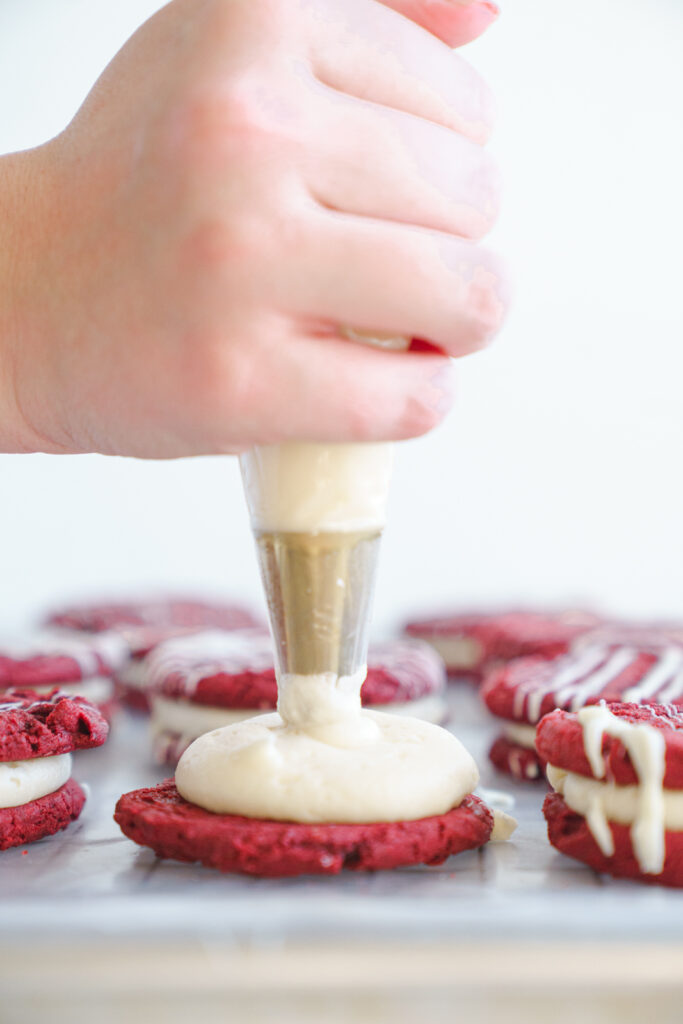
- Transfer frosting to a piping bag (or a plastic bag with the tip cut off).
Assembling the Cookie Sandwiches
- Pipe the cream cheese frosting onto the flat side of half the cookies. Don’t skimp—this is the best part!
- Top with the remaining cookies, pressing gently to form cookie sandwiches.
- Store in an airtight container at room temperature for up to 2 days, or in the refrigerator for longer freshness.
Tips and Tricks – Red Velvet Cookie Sandwiches
- Use gel food coloring for a bold red hue without altering the dough’s texture.
- Chill the dough for 10-15 minutes if it’s too soft to handle.
- Sprinkle a little sea salt on the frosting for an extra flavor boost.
Recommended Tools
- Stand mixer with a paddle attachment
- Small cookie scoop
- Wire rack
- Piping bag or plastic bag
- **LorAnn’s Emulsion **
- Red food coloring
FAQs – Red Velvet Cookie Sandwiches
Can I use cake mix to make these cookies?Totally! A red velvet cake mix cookie is a great shortcut, but homemade has that extra-special touch.
How do I store leftover cookies?Keep them in an airtight container for up to 2 days at room temperature or a week in the fridge. They’ll stay soft and chewy—promise!
Can I freeze these cookies?Yes! You can freeze the baked cookies or the unbaked dough for up to 3 months. Just thaw, frost, and enjoy.

Storing and Freezing Instructions
- Store unfrosted cookies in an airtight container for up to a week. Frosted cookies should be refrigerated.
- To freeze, layer cookies between sheets of parchment paper in a freezer-safe container. Done and done!
These delicious red velvet sandwich cookies are here to make your dessert dreams come true. Whether you’re baking for Valentine’s Day, a cookie tray, or just because it’s a good day for cookies (hint: it always is), this red velvet cookie sandwich recipe will be your new go-to. Don’t forget to sneak one for yourself—you earned it!
WANT MORE RED VELVET RECIPES? Here are some!
- Oreo Red Velvet Cookies With Frosting
- Best Red Velvet Cake With Chocolate Frosting
- Easy Red Velvet Oreo Brownie Recipe
f you loved these Red Velvet Cookie Sandwich don’t forget to leave a 5-star rating and a comment! I’d love to hear your feedback or answer any questions you have! Follow me on Instagram, Pinterest, and TikTok. I post so many fun things on all platforms.
Recipe
Red Velvet Cookie Sandwiches
Ingredients
For The Cookies
- ½ cup unsalted butter soften to room temperature
- ½ cup light brown sugar
- ½ cup granulated sugar
- 1 large egg
- 1 egg yolk
- 2 teaspoons pure vanilla extract
- 2 teaspoon LorAnn’s Red velvet emulsion can sub for red food coloring
- ¼ cup cocoa powder regular not dark
- 1 ½ cups all-purpose flour
- ¾ teaspoon baking soda
- ½ teaspoon salt
For the Cream Cheese Frosting
- 3 ounces cream cheese softened
- ½ cup unsalted butter softened
- ¼ teaspoon vanilla extract
- 3 cups powdered sugar
- Pinch of salt
Instructions
For The Cookie Dough
- Preheat your oven to 350°F (180°C). Line a baking sheet with parchment paper. Set aside.
- In a medium-sized bowl, using an electric hand mixer or in a bowl of a stand mixer fitted with the paddle attachment, cream together the butter, granulated sugar, and brown sufar until light and fluffy, about 3 minutes.½ cup unsalted butter soften to room temperature, ½ cup light brown sugar, ½ cup granulated sugar
- With a rubber spatula, scrape down the sides and the bottom of the bowl. Add the egg, mix on medium speed for 20 seconds, scrape down the sides and add the egg yolk, and mix for 20 more seconds.1 large egg, 1 egg yolk
- Add the the emulsion (or the food coloring) and pure vanilla extract. Mix on low until well combined, about 30-60 seconds.2 teaspoons pure vanilla extract, 2 teaspoon LorAnn’s Red velvet emulsion
- Add the Dutch process cocoa powder, all purpose flour, salt, and baking soda to the wet ingredients, mixing on low until just combined. Be careful not to overmix.¼ cup cocoa powder, 1 ½ cups all-purpose flour, ¾ teaspoon baking soda, ½ teaspoon salt
- Using a 1-tablespoon size cookie scoop, scoop out the dough onto the prepared baking sheets, leaving enough space between each cookie. You will get 12 cookies one one sheet pan, and 11 cookies on the other (I always get an extra to do a taste test for funnies)
- Bake in the preheated oven for about 10-11 minutes or until the edges are set and the centers are slightly soft. While the cookies are warm, and if the cookies don’t spread flat, gently press them down with the bottom of a cup or spatula to create an even, flat surface. Aim for them to be ¼ inch thick.
- Allow the cookies to cool on the baking sheets for a few minutes before transferring them to a wire rack to cool completely.
- Once the cookies are completely cooled, you can frost them with the cream cheese frosting.
For the frosting
- In the bowl of an electric mixer fitted with the paddle attachment (or using an electric hand mixer), beat the softened butter and cream cheese on medium speed for about 2 minutes. Scrape down the sides and bottom of the bowl, then beat for another 2 minutes. With the mixer on low speed, gradually add the powdered sugar, followed by the vanilla, ground cinnamon, and salt. Once combined, increase the speed to medium and beat until smooth and fluffy, about 1-2 minutes.3 ounces cream cheese softened, ½ cup unsalted butter softened, ¼ teaspoon vanilla extract, 3 cups powdered sugar, Pinch of salt
- Once the cookies are completely cooled, spread or pipe the cream cheese frosting onto the bottom sides of half of the cookies. If using a piping bag, cut a medium size hole. Sandwich the remaining unfrosted cookies on top, pressing gently to secure.
Leave a Reply