
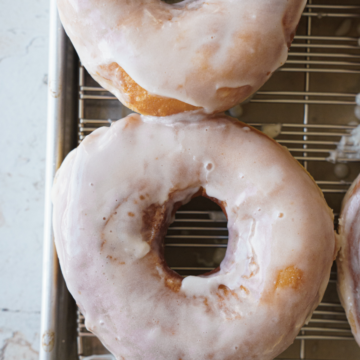
Brioche Donut Recipe – Light, airy donut fried to a soft pillowy texture! It has the best vanilla glaze on top!
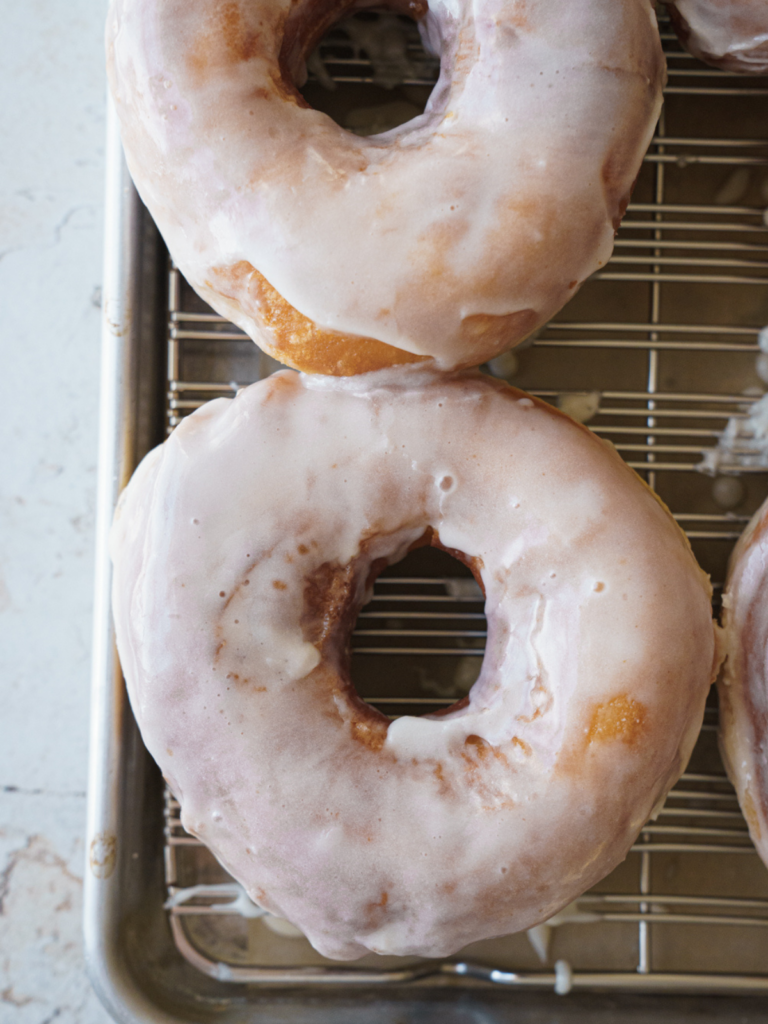
These fluffy brioche donuts are everything a homemade donut should be light, airy, and coated in a perfect glaze. Made with a rich, very enriched dough, this recipe creates the best fried donuts with a soft, pillowy texture inside and a golden, crisp exterior. Donuts have always been one of my favorite things to make. There’s just something about biting into a fresh, warm donut that makes the entire process worth it.
While at a blogging conference, Sugar Geek Show talked about how we used to fry brioche doughnuts in lard, but then switched to oil when lard was deemed “too unhealthy.” But honestly? The difference is minimal—except for flavor! That got me thinking.
Since I can’t find a decent donut around here, I decided to make my own. And not just any donut a brioche donut recipe that’s soft, rich, and fried to golden brown perfection.
- Old Fashion Blueberry Donut Bundt Cake
- The Greatest Powder Sugar Apple Cider Donut Cake
- Spice Cake With Cream Cheese Frosting
Why You’ll Love This
- Uses simple ingredients you probably already have.
- The fluffy brioche doughnut texture makes them extra light and airy.
- This recipe is perfect for stuffing with your favorite fillings like vanilla cream, Bavarian cream, lemon curd, or chocolate filling.
- The frying process is easy to follow, even if it’s your first time making donuts.
Ingredients
A good brioche donut dough starts with the right ingredients. We’re using a mix of bread flour (or AP flour) for structure, warm water to activate the instant yeast, and butter to give the dough its rich, tender texture.
- Active Dry Yeast: This recipe uses active dry yeast, which needs to be activated in warm water with a little sugar. If you prefer instant yeast, you can skip the activation step and mix it directly with the flour.
- Bread Flour vs. All-Purpose Flour: Bread flour gives the donuts a slightly chewier texture, but all-purpose flour works just as well for a softer bite.
- Lard vs. Canola Oil: Traditional brioche donuts were fried in lard for richer flavor, but canola oil is a great alternative. If you want the most authentic taste, go for lard!
- Melted Butter in the Glaze: This helps create a smooth, shiny coating that clings to the donuts beautifully.
- Granulated Sugar: Provides sweetness and helps activate the yeast. It also contributes to the donuts’ golden brown color when frying.
- Eggs: Enrich the dough, adding moisture and helping create a soft, fluffy brioche donut texture.
- Lard or Canola Oil (Frying Oil): Lard gives a richer, more traditional flavor, while canola oil provides a neutral taste and crisp texture. Both work well for frying.
- Powdered Sugar: The base for the glaze, creating a smooth and slightly glossy finish when combined with liquids.
- Vanilla Extract: Adds warmth and depth to the glaze, enhancing the overall flavor of the donuts.
- Corn Syrup: Helps create a shiny, smooth glaze that stays soft without becoming too brittle or grainy.
How to Make Brioche Donuts
The secret to fluffy brioche donuts is using a slow proofing process. This develops deep flavor while keeping the dough easy to work with.
- In the bowl of a stand mixer, combine warm water, active dry yeast, and 1 teaspoon of sugar. Let it sit for 5-10 minutes until foamy—this is your yeast mixture.
- Add the eggs, sugar, and flour to the bowl. Attach the dough hook attachment and mix on low speed until the dough comes together.
- Knead on medium speed for 4 minutes. Then, add the softened butter and continue kneading for another 6 minutes until the dough is smooth and slightly sticky.
- Perform the window pane test by stretching a piece of dough between your fingers—if it stretches thin without tearing, it’s ready.
First Rise (Cold Proofing)
The dough needs time to rise and develop flavor. Instead of rushing it, we’re letting it chill overnight.
- Place the dough in an oiled bowl, cover with plastic wrap, and refrigerate overnight (8-12 hours). The cold dough will develop incredible flavor and be easier to handle.
Shape the Donuts
After a long rest, the brioche donut dough is ready to be rolled and cut into shape.
- The next day, roll the dough out on a lightly floured surface to ½-inch thickness.
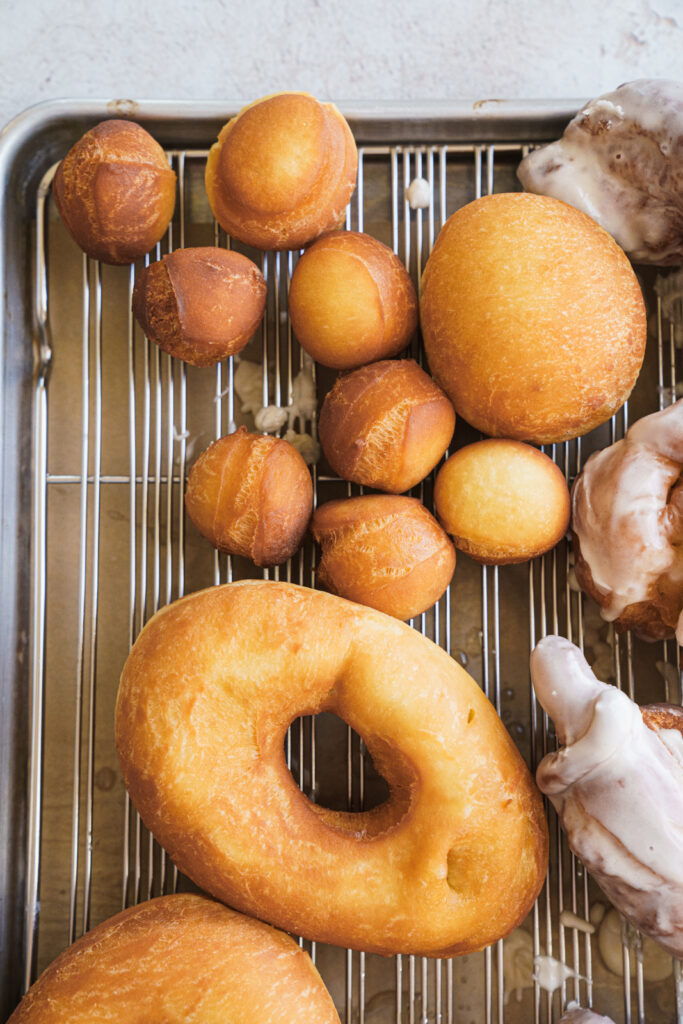
- Cut out the donuts using a sharp cutter, then place them on a baking sheet lined with parchment paper. Instead of re-rolling scraps, twist them into crullers.
- Cover with a tea towel and let them rise in a warm spot for 30 minutes to 1 hour. This is the second rise, and the dough should be puffy.
Frying Process
Now for the fun part—frying the donuts!
- Heat frying oil in a deep fryer or heavy-bottomed pot to 350°F. Use a candy thermometer for the most accurate way to monitor the oil temperature.
- Fry the donuts in hot oil for 1-2 minutes per side until they’re golden brown. Use a slotted spoon to transfer them to a paper towel-lined wire rack to drain.
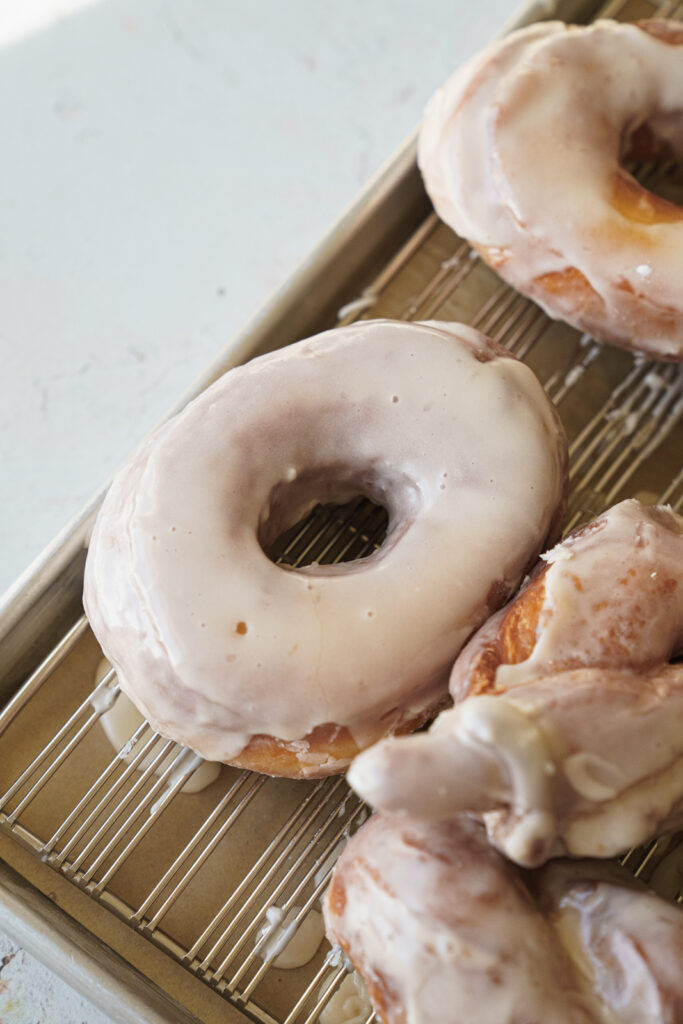
Glazing the Donuts
A good glaze makes all the difference. This one is smooth, shiny, and coats each donut perfectly.
- While the donuts cool, whisk together the glaze ingredients in a mixing bowl until smooth.
- Dip each donut, letting excess glaze drip off onto a cooling rack.
- Let them dry completely before enjoying!
What is cold proofing?
- Develops Flavor – The slow fermentation process allows the yeast to break down the sugars more gradually, resulting in a richer, more complex flavor. This is why brioche doughnuts have that deep, buttery taste instead of a bland, yeasty one.
- Improves Dough Structure – Since brioche is a very enriched dough (with lots of butter and eggs), it can be tricky to handle. Chilling it firms up the butter, making the dough easier to shape and work with.
- Better Texture – A longer, slower rise helps develop stronger gluten, leading to fluffy brioche donuts with a soft yet structured crumb.
- Prevents Overproofing – If lleft at room temperature too long, dough can rise too fast and collapse. The fridge slows down the process, giving you more control over when you’re ready to shape and fry.
Tips for Best Results
- Dough Rise: The warm environment helps proof the dough quickly. If your kitchen is cold, place the dough near a slightly warmed oven.
- Oil Temperature: Keep it at 350°F for even frying. Too low, and your donuts absorb oil; too high, and they burn before cooking through.
- Yeast Activation: If your yeast doesn’t foam after 10 minutes, your water may have been too hot or too cold, or your yeast might be expired. Try again with fresh yeast and water between 100-110°F.
- Butter Incorporation: Add the softened butter a few pieces at a time, letting it fully mix in before adding more. The dough may look greasy at first but will come together as you knead.
- Second Proofing: The doughnuts are ready when they look slightly puffed and a gentle poke with your finger leaves a slight indentation that slowly springs back.
- Frying Temperature: Maintain the oil temperature at 350°F—if it drops too low, the doughnuts will absorb too much oil and be greasy; if too high, they’ll brown too quickly before cooking through.
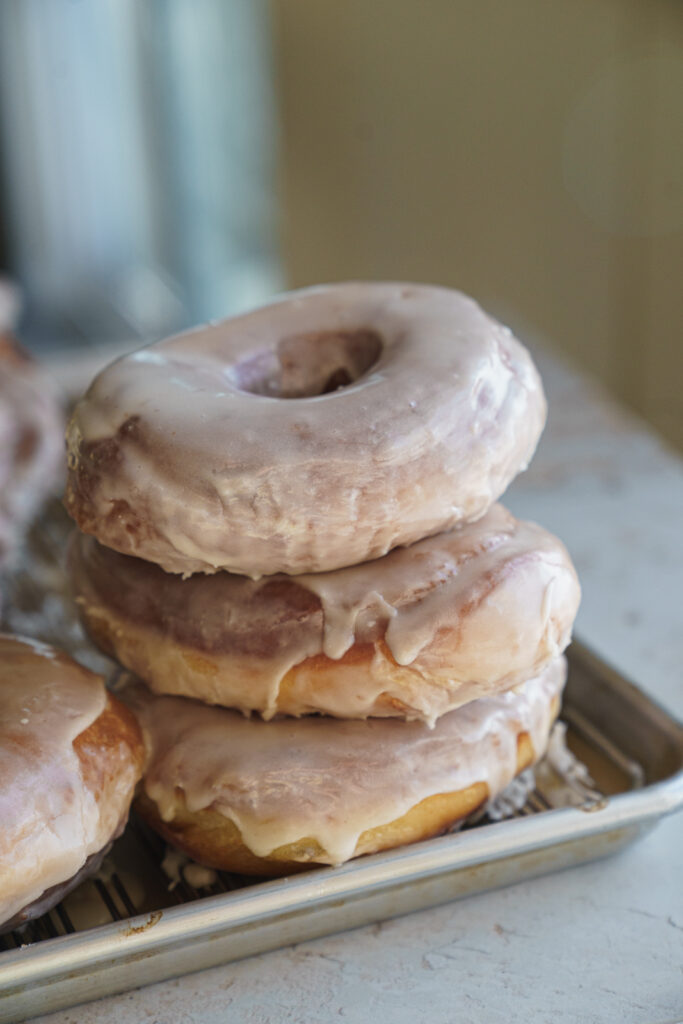
- Glazing Tip: For an extra-thick glaze, let the first layer set for a minute, then dip the doughnuts a second time.
- With the extra dough, you cant reroll it so you can just fry up the donut holer and twist the extra and make it into a fun shape!
FAQs – Homemade Brioche Donut Recipe
- Why is my dough too sticky? Brioche dough is naturally sticky due to its high butter and egg content. If it feels too sticky to work with, let it rest in the fridge for 15-20 minutes before handling it. Lightly flouring your work surface and hands also helps.
- Why didn’t my dough rise? If your dough isn’t rising, your yeast might be expired, or the proofing environment may be too cold. Make sure your yeast mixture gets foamy before adding other ingredients. If your kitchen is chilly, place the dough in a warm oven (turned off) with a bowl of hot water.
- How do I know if I overproofed my donuts? If the dough is too airy and deflates when touched, it may be overproofed. If this happens, gently reshape the dough and let it proof for a shorter time before frying.
- Can I make these ahead of time? Yes! You can let the shaped donuts proof in the fridge overnight. In the morning, let them come to room temperature before frying.
Recommended Tools – Brioche donut recipe
The right tools make all the difference when making these homemade brioche donut recipe. Here’s what I recommend:
- Bowl of your stand mixer with dough hook attachment
- Bench scraper for handling dough
- Candy thermometer for checking oil temperature
- Deep fryer or heavy-bottomed pot
- Donut cutter
- my favorite frying pan
Storing & Freezing Instructions
here is how I store my donuts!
- Room Temperature: Store in an airtight container for up to 2 days. To keep them as fresh as possible, place a paper towel in the container to help absorb excess moisture. If they start to feel stale, you can lightly warm them in the microwave for 5-10 seconds before eating.
- Refrigerating: If you need to store them a little longer, you can refrigerate them in an airtight container for up to 4 days. Keep in mind that refrigeration can slightly dry them out, so warming them up before serving is recommended.
- Freezing: Freeze unglazed donuts in a plastic wrap-lined airtight container for up to a month. To freeze, arrange them in a single layer on a baking sheet and freeze until solid before transferring them to a freezer bag. This prevents them from sticking together.
- Reheating: To bring frozen donuts back to life, warm them in a 300°F oven for about 5-7 minutes or microwave for 10-15 seconds. If they were previously glazed, the glaze may melt slightly, but they’ll still be delicious!

If you loved this Brioche Donut Recipe don’t forget to leave a 5-star rating and a comment! I’d love to hear your feedback or answer any questions you have! Follow me on Instagram, Pinterest, and TikTok. I post so many fun things on all platforms.
- Blueberry Cream Cheese Cookies With Lemon Glaze
- Easy 9 x13 Chocolate Cake With Buttermilk
- Lazy Chocolate Nutella Cake Recipe
Recipe
Brioche Donut Recipe
Ingredients
For the Dough:
- 1 ¼ cups warm water
- 2 ¼ teaspoon active dry yeast
- ½ cup salted butter softened
- 4 large eggs
- ½ cup granulated sugar + 1 tsp for yeast activation
- 4 ½ cups bread flour or all-purpose flour
- 2 cups lard or canola oil for frying
For the Glaze:
- 4 cups powdered sugar
- ¼ teaspoon salt
- 1 teaspoon vanilla extract
- 1 tablespoon melted butter
- ⅓ cup hot water
- 1 tablespoon corn syrup
Instructions
- In the bowl of a stand mixer fitted with the paddle attachment, mix warm water, yeast, and 1 teaspoon of sugar. Let it sit for about 10 minutes until foamy.1 ¼ cups warm water, 2 ¼ teaspoon active dry yeast
- Add the eggs, remaining sugar, and flour to the bowl. Switch to the dough hook attachment and mix on low speed until a shaggy dough forms.4 large eggs, ½ cup granulated sugar + 1 tsp, 4 ½ cups bread flour or all-purpose flour
- Knead on low speed for 4 minutes. Add the softened butter and continue kneading for another 6 minutes until the dough is smooth, stretchy, and slightly sticky. To check if it’s ready, perform the windowpane test—take a small piece of dough and gently stretch it between your fingers. If it becomes thin enough to see light through without tearing, it’s ready.½ cup salted butter
- Transfer the dough to a greased bowl, cover it, and refrigerate for 8 to 12 hours (overnight is best).
- The next day, roll the dough out on a lightly floured surface to ½-inch thickness. Cut out donuts using a donut cutter and place them on greased parchment paper. Instead of re-rolling scraps, twist them into crullers. This dough doesn’t do well if you roll it out multiple times, so suggest making the donut balls and the crullers
- Cover and let the donuts rise at room temperature until puffy, about 30 minutes to 1 hour.
- Heat oil in a deep pot to 350°F. Fry the donuts in batches for 1 to 2 minutes per side, flipping with wooden chopsticks or tongs. Drain on a paper towel-lined wire rack.2 cups lard or canola oil
- While the donuts cool, whisk together powdered sugar, salt, vanilla, melted butter, hot water, and corn syrup in a large bowl until smooth.4 cups powdered sugar, ¼ teaspoon salt, 1 teaspoon vanilla extract, 1 tablespoon melted butter, ⅓ cup hot water, 1 tablespoon corn syrup
- Dip each donut into the glaze, coating both sides. Let the excess drip off on a cooling rack and allow the glaze to set completely before enjoying.
Notes
Butter Incorporation: Add the softened butter a few pieces at a time, letting it fully mix in before adding more. The dough may look greasy at first but will come together as you knead.
Second Proofing: The doughnuts are ready when they look slightly puffed and a gentle poke with your finger leaves a slight indentation that slowly springs back.
Frying Temperature: Maintain the oil temperature at 350°F—if it drops too low, the doughnuts will absorb too much oil and be greasy; if too high, they’ll brown too quickly before cooking through.
Glazing Tip: For an extra-thick glaze, let the first layer set for a minute, then dip the doughnuts a second time.
Debbie says
Just made these, and although they were work, they were totally worth it! I loved your step by step instructions and details. This made the process easy to follow and hard to mess up. I tweaked the glaze just a little, added a smidgen of extra water to thin. So good! Love how the glaze sets!
Molly Murphy says
Debbie, thank you!!! If you loved this recipe, I just posted about carrot cake brioche donut recipe that topped this one! (in my opinion!)
Cc says
I tried this today but the dough isn’t coming together for me at all. It’d very, very wet and sticky and won’t form the windowpane test at all. I’ve new been kneading for over 15 mins but dough is very sloppy. What have I done wrong? I’m in the uk so followed metric
Molly Murphy says
it could be a tad bit more humid where you are versus the america and the midwest where i live. i would add 1/4 cup of flour and until it comes together. the dough should be sticky! that is normal!
Anonymous says
Oh no definitely not humid here unfortunately lol I kneaded it for about 20 mins and it kinda came together then, it did sort of make the window pane test. Will try the next step tomorrow
I’m wondering are 4 large uk eggs different to 4 large USA eggs?
Cc says
Thanks
Brian Ross says
Thank you for sharing this recipe