No Bake Biscoff Cheesecake – Used with simple ingredients, speculoos cookies, and a creamy biscoff cheesecake filling, this no bake recipe will be devoured in one sitting!
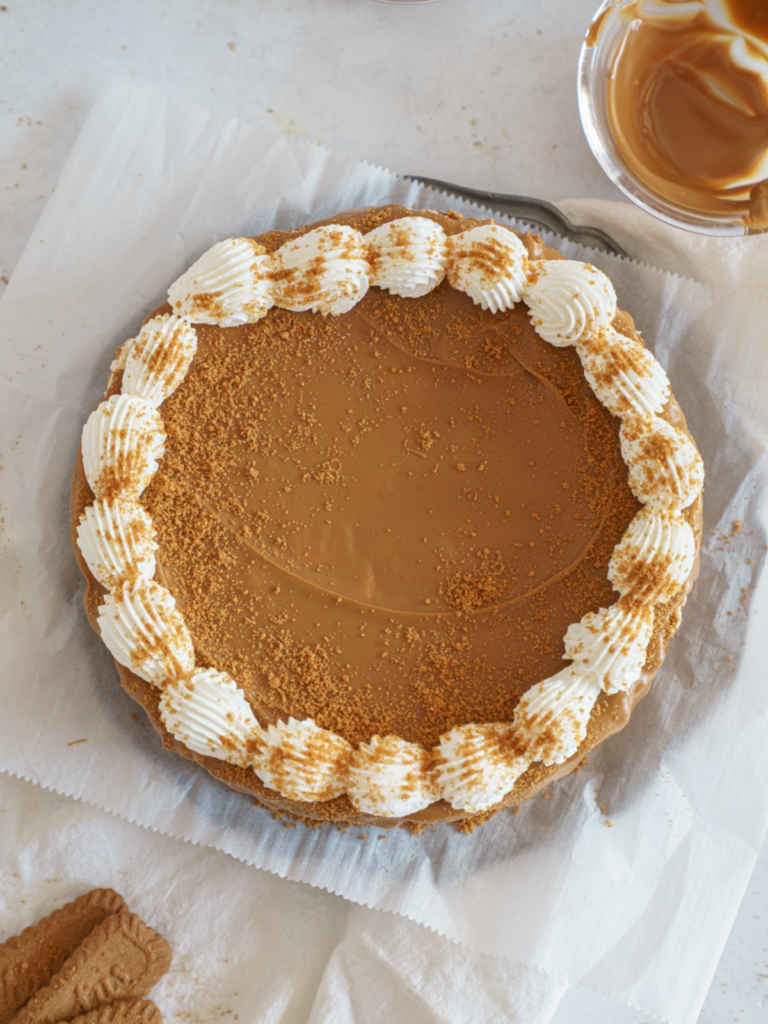
If you’re a fan of Biscoff cookies, no bake desserts, and creamy cheesecake, you’re in for a treat! This no bake Biscoff cheesecake is easy to make, requires no oven, and is perfect for any occasion. Let’s dive into this indulgent recipe that’s sure to impress!
For more no bake cheesecake recipes, here are some you will love!
- Easy & Delicious No Bake Oreo Cheesecake Recipe
- Easy No Bake Blueberry Cheesecake Recipe
- No Bake Peanut Butter Chocolate Pie
Why You’ll Love This Recipe
- No-Bake Convenience: No need to turn on the oven, making it perfect for hot days.
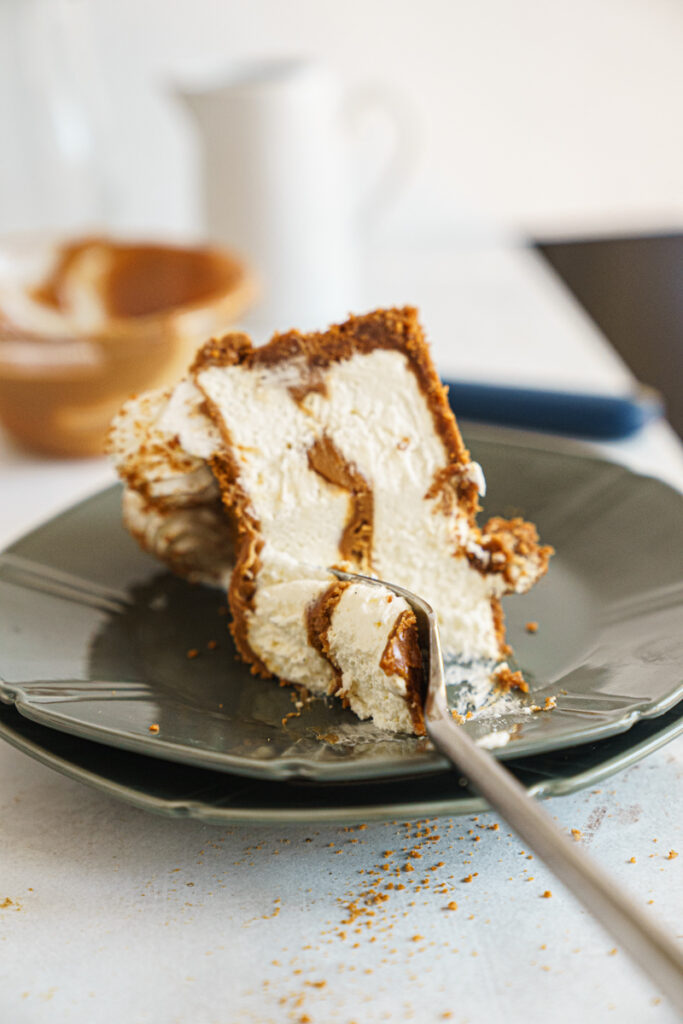
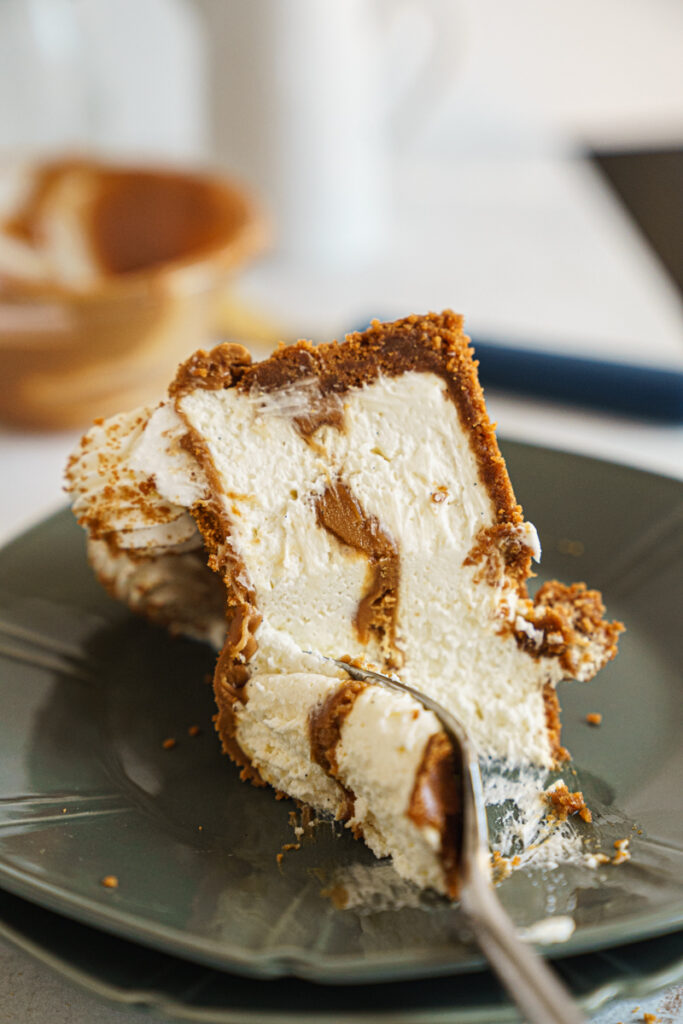
- Rich and Creamy: A luscious cheesecake filling combined with the unique flavor of Biscoff cookies.
- Easy to Make: Simple steps that even beginner bakers can follow.
- Showstopper Dessert: A visually stunning dessert that’s sure to be a hit at any gathering.
Ingredients – No Bake Biscoff Cheesecake
For detailed measurements and instructions, refer to the recipe card below.
- Biscoff cookies, pulsed to a powder in a food processor
- unsalted butter, melted
- brown sugar
- full fat heavy whipping cream
- full-fat cream cheese, softened to room temperature
- granulated sugar
- confectioners’ sugar
- sour cream, at room temperature
- pure vanilla extract
- 1 jar biscoff cookie butter
Instructions – no bake biscoff cheesecake
Need to know what you need for this No Bake Biscoff Cheesecake? Here is a list of things you might not have but will need! For a full list, please check out the recipe card at the bottom!
Prepare the Crust:
- Place the 30 Biscoff cookies in a food processor and pulse until they turn into a fine powder. If you don’t have a food processor, place the cookies in a large zip-lock bag and crush them with a rolling pin until finely ground.
- In a medium-sized bowl, combine the Biscoff crumbs, brown sugar, and melted butter. Mix until the crumbs are evenly coated.
- Lightly spray a 9-inch springform pan with cooking spray. Press the mixture into the bottom and slightly up the sides of the pan. Use the bottom of a measuring cup to pack it as tightly as possible.
- Freeze the crust for 10–20 minutes while preparing the filling.
Make the Filling:
- Using a hand mixer or a stand mixer with a whisk attachment, whip the cold heavy cream until stiff peaks form (about 4–5 minutes). Set aside.
- In another bowl, beat the softened cream cheese and granulated sugar on medium speed until smooth and creamy. Scrape down the sides of the bowl as needed.
- Add the confectioners’ sugar, sour cream, and vanilla extract. Beat on medium-high speed for 2–3 minutes until fully combined and smooth. Ensure there are no lumps.
- Gently fold the whipped cream into the cream cheese mixture using a silicone spatula. Combine slowly to retain the air in the whipped cream.
Assemble the Cheesecake:
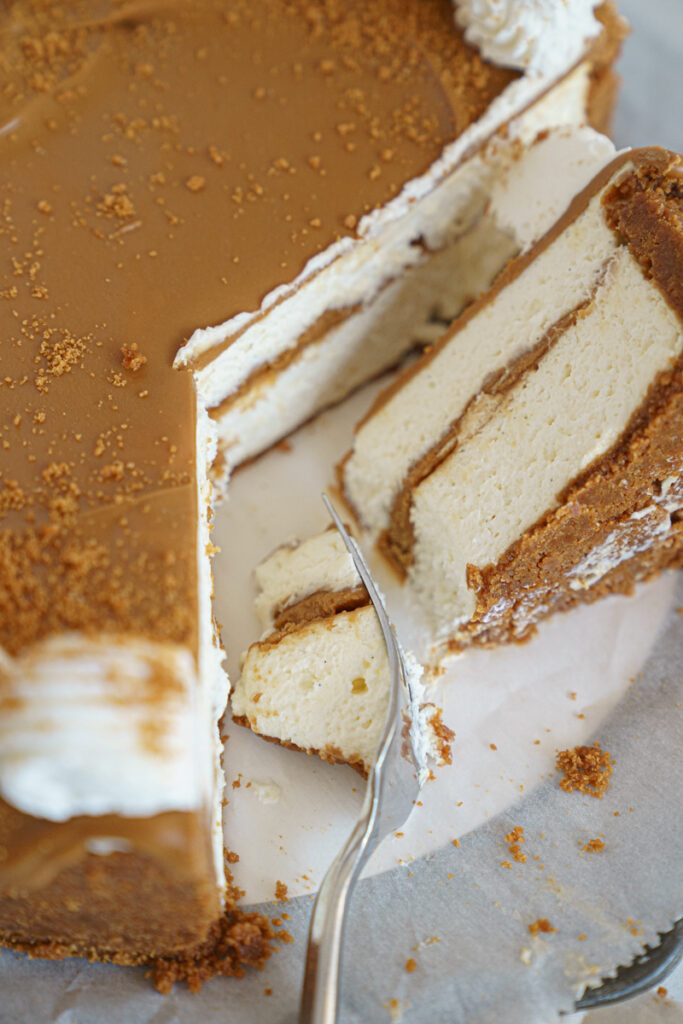
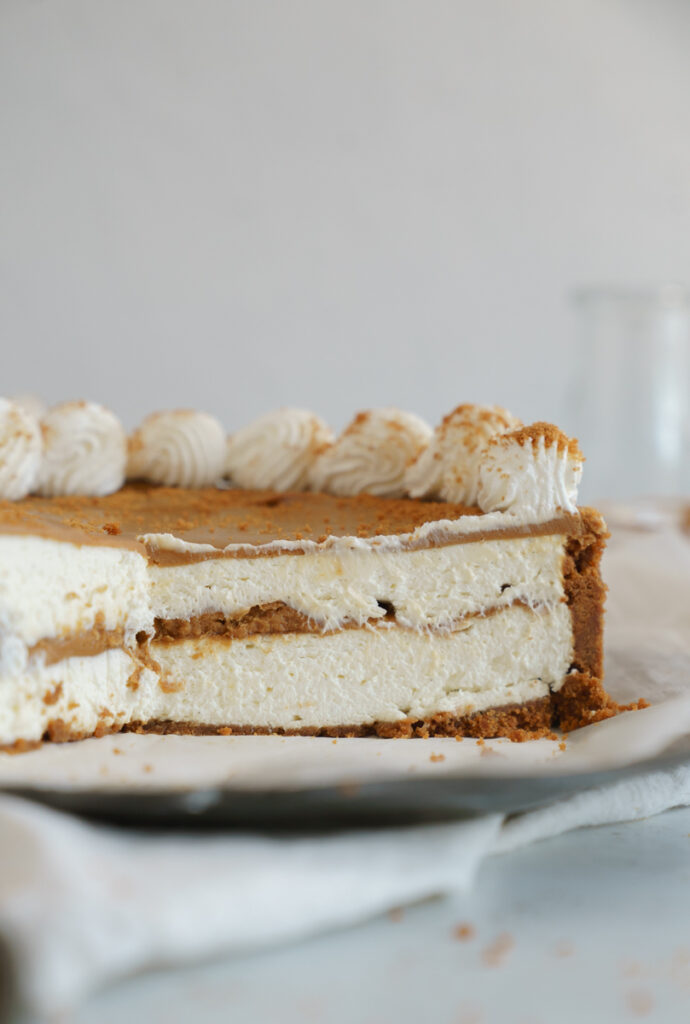
- Remove the crust from the freezer and spread half of the filling evenly over it using an offset spatula to smooth the top.
- Carefully pour half of the melted Biscoff spread into the middle of the filling. Use the back of a spoon to gently spread the Biscoff spread towards the edges of the cheesecake.
- Spread the remaining cheesecake filling on top of the Biscoff spread.
- Pour the remaining half of the melted Biscoff spread on top and evenly spread across the cheesecake.
- Cover the cheesecake tightly with plastic wrap and refrigerate for at least 6–8 hours, preferably overnight (about 12 hours), for the best set.
Next Day:
- When ready to serve, carefully run a knife around the edges of the cheesecake to release it from the pan. Remove the sides of the springform pan.
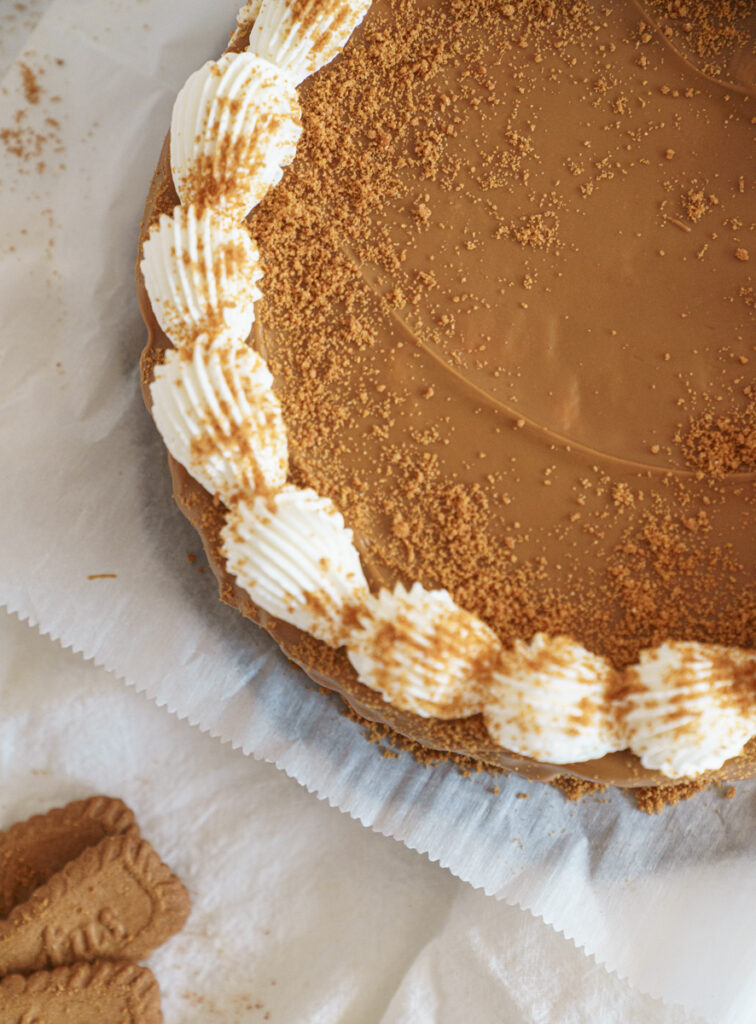
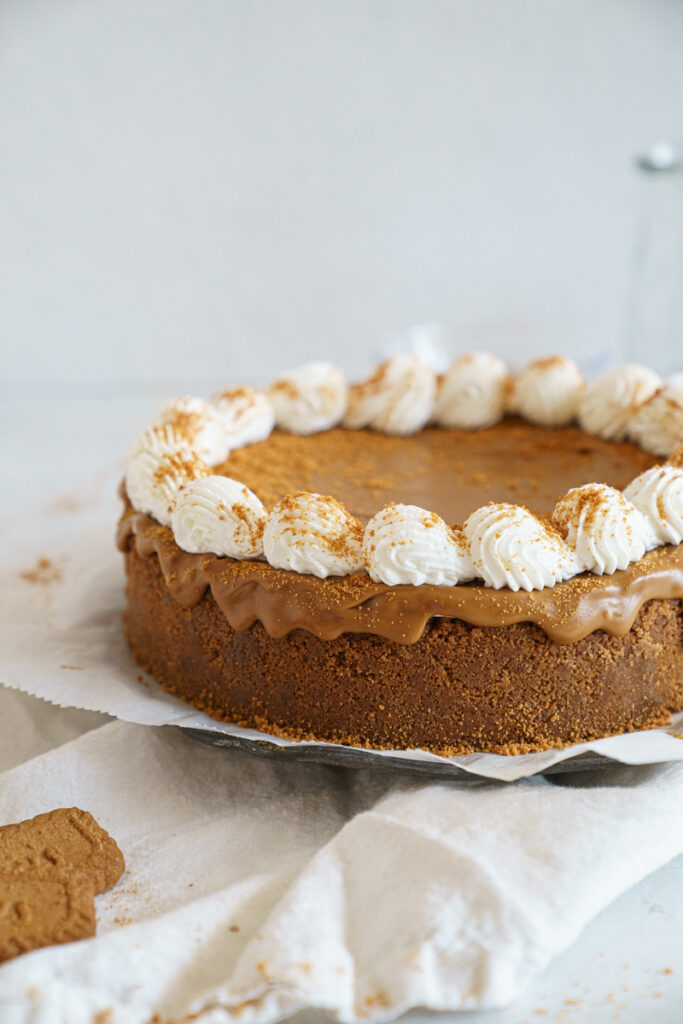
- In the bowl of a stand mixer fitted with the whisk attachment, beat the heavy cream until stiff peaks form. Add the whipped cream, and sprinkle with a few extra Biscoff crumbs to the top of the cheesecake!
- Serve immediately and enjoy! Don’t let the cheesecake sit out too long to maintain its texture.
Tips and Tricks – No Bake Biscoff Cheesecake
- Chill the Bowl and Whisk: For best results, chill your mixing bowl and whisk before whipping the cream.
- Room Temperature Ingredients: Make sure the cream cheese and sour cream are at room temperature to ensure a smooth filling.
- Gently Fold: When folding the whipped cream into the cream cheese mixture, do it slowly to retain the air and keep the filling light and airy.
- Use a Springform Pan: This helps in easily removing the cheesecake without damaging it.
- Line with Parchment Paper: For easier removal, line the bottom of the springform pan with parchment paper.
- Store Properly: Keep the cheesecake in an airtight container in the refrigerator to maintain freshness.
Recommended Tools
- Food processor or large zip-lock bag and rolling pin
- 9-inch springform pan or springform tin
- Hand mixer or stand mixer with whisk attachment
- Silicone spatula
- Offset spatula
- Measuring Cups and Spoons: Essential for accurately measuring your ingredients.
- Microwave-Safe Bowl: For melting the Biscoff spread.
- Silicone Spatula: Great for folding the whipped cream into the cream cheese mixture.
- Offset Spatula: Ideal for spreading the cheesecake filling smoothly.
- Plastic Wrap: To cover the cheesecake tightly while it sets in the refrigerator.
- Knife: For running around the edges of the cheesecake to release it from the pan.
- Serving Platter: To beautifully present your cheesecake.
FAQs – No Bake Biscoff Cheesecake
Can I use a different type of cookie for the crust?Yes, you can substitute Biscoff cookies with graham crackers or any other crunchy cookie of your choice.
How long can I store the cheesecake?The cheesecake can be stored in the refrigerator for up to 5 days. Make sure it’s covered tightly to prevent it from drying out.
Can I freeze the cheesecake?Yes, you can freeze the cheesecake. Wrap it tightly in plastic wrap and aluminum foil, and it will keep for up to 2 months. Thaw it in the refrigerator overnight before serving.
What should I do if the cheesecake filling is too soft?Make sure the cream cheese is fully softened to room temperature before mixing. Also, ensure that the whipped cream is whipped to stiff peaks. If the filling is still too soft, refrigerate it for a bit longer to help it set.
What if I don’t have a springform pan?You can use a regular pie dish, but it might be a bit more challenging to remove the cheesecake. Line the dish with parchment paper for easier removal.
Storing and Freezing Instructions
To store the no bake Biscoff cheesecake, keep it covered in an airtight container in the refrigerator for up to 5 days. If you wish to freeze it, wrap it tightly in plastic wrap and aluminum foil, and it will keep for up to 2 months; thaw in the refrigerator overnight before serving.
Don’t forget to leave a 5-star review and a comment if you loved the recipe or have any questions! Your feedback means a lot to me. Also, don’t forget to follow me on Instagram, Pinterest, and TikTok for more fun content. I can’t wait to connect with you there!
This No Bake Biscoff Cheeses cake is are perfect for any occasion and are sure to become a staple in your cookie recipes collection. Happy baking!
FOR BAKED CHEESECAKE RECIPES, HERE ARE SOME I RECOMMEND!
- Best White Chocolate Raspberry Cheesecake Recipe
- The Ultimate S’mores Cheesecake Recipe!
- Best Cinnamon Roll Cheesecake Recipe
Recipe
No Bake Biscoff Cheesecake
Ingredients
Biscoff Cookie Crust:
- 30 whole Biscoff cookies pulsed to a powder in a food processor
- ½ cup unsalted butter melted
- 2 teaspoons brown sugar
Cheesecake Filling:
- 1 and ¼ cups heavy whipping cream
- 24 ounces full-fat cream cheese softened to room temperature
- ½ cup granulated sugar
- ½ cup confectioners’ sugar
- ¼ cup sour cream at room temperature
- 1 teaspoon pure vanilla extract
- 1 jar of biscoff spread melted and cooled
For the Top optional:
- ½ cup heavy whipping cream or ready whip cream
Instructions
Prepare the Crust:
- Place the 30 Biscoff cookies in a food processor and pulse until they turn into a fine powder. If you don’t have a food processor, place the cookies in a large zip-lock bag and crush them with a rolling pin until finely ground.
- In a medium-sized bowl, combine the Biscoff crumbs, brown sugar, and melted butter. Mix until the crumbs are evenly coated.
- Lightly spray a 9-inch springform pan with cooking spray. Press the mixture into the bottom and slightly up the sides of the pan. Use the bottom of a measuring cup to pack it as tightly as possible. Freeze the crust for 10–20 minutes while preparing the filling.
For the cheesecake filling
- Using a hand mixer or a stand mixer with a whisk attachment, whip the cold heavy cream until stiff peaks form (about 4–5 minutes). Set aside.
- In another bowl, beat the softened cream cheese and granulated sugar on medium speed until smooth and creamy. Scrape down the sides of the bowl as needed.
- Add the confectioners’ sugar, sour cream, and vanilla extract. Beat on medium-high speed for 2–3 minutes until fully combined and smooth. Ensure there are no lumps.
- Gently fold the whipped cream into the cream cheese mixture using a silicone spatula. Combine slowly to retain the air in the whipped cream.
- Remove the crust from the freezer and spread half of the filling evenly over it using an offset spatula to smooth the top.
- Carefully pour half of the melted Biscoff spread into the middle of the filling. Use the back of a spoon to gently spread the Biscoff spread towards the edges of the cheesecake.
- Spread the remaining cheesecake filling on top of the Biscoff spread.
- Pour the remaining half of the melted Biscoff spread on top and evenly spread across the cheesecake.
- Cover the cheesecake tightly with plastic wrap and refrigerate for at least 6–8 hours, preferably overnight (about 12 hours), for the best set.
Serving
- When ready to serve, carefully run a knife around the edges of the cheesecake to release it from the pan. Remove the sides of the springform pan.
- In the bowl of a stand mixer fitted with the whisk attachment, beat the heavy cream until stiff peaks form. Top the cheesecake with the whipped cream, and sprinkle with a few extra Biscoff crumbs. I used Wilton 8B to pipe along the border!
- Serve immediately and enjoy! Don’t let the cheesecake sit out too long to maintain its texture.

Leave a Reply